Zucchini Noodle Lasagna with Oyster Mushrooms, Basil & Swiss Chard

zucchini_lasagna.jpg
zucchini.jpg
oyster_shrooms2.jpg
chard.jpg
oyster_shrooms.jpg
chard_bath.jpg

Let’s be honest: food is contentious. It is personal, it is cultural, it is political, it is emotional. 

We all have a diet (a general, baseline set of foods we do and don’t eat); we go on diets; and we can be very convicted about what foods we believe should or shouldn’t be included in a healthy diet. 

Some people are purists. Give them a pizza made with a cauliflower crust and they’re like, EXCUSE ME THAT IS NOT PIZZA. Which is a fair stance to take. Some people are open to culinary interpretation, playing with new ways of iterating classics. Oftentimes, substitutions are made to accommodate dietary preferences or restrictions, which is how I came to use a lot of the ingredients I do (especially in sweets :). 

So, zucchini noodle lasagna. Arguably not lasagna. But maybe it is lasagna! Call it whatever you want. Ultimately, it is freakin’ delicious (I made it four times before I finally dedicated time and effort to photographing it to share with you all) and—yes, I am going to go there—much healthier for you than traditional lasagna.

Modern nutritional science has evolved enough at this point to recognize that refined, white flour is not good for us. Yes, it makes dough light and elastic and taste divine. But it is massively inflammatory and our bodies do not like it, especially in excess. 

Do I eat white flour? Yes. In fancy croissants and sourdough pizza, mostly. Am I conscious about the amount and quality of white flour I consume? I try to be.

We have to pick our battles. If we value health and value pleasure, both of which I believe are absolutely vital to life, we need to determine what percentage of each feels like balance for us and we must, at times, make some adjustments to keep those scales aligned. I bake cookies with whole grain flour and turn cauliflower into rice in service of health.

That being said, zucchini is a fantastic substitute for white flour in the form of pasta. Is it the exact same thing? No. Will it satiate the cravings steeped in familial memory of your Italian grandmother? Probably not. Is it still delicious and WAY healthier for you? Yes, 100%. 

Funnily enough, my inspiration for this lasagna came not from wanting to have lasagna sans flour, but from an approach to food that I developed during the two weeks last year that I was hardcore Keto (…just to see what it would be like). A diet centered around foods with a high percentage of fat, Keto suddenly thrust a number of ingredients that were atypical for me into a primary position in my life—cheese among them. I ditched the diet pretty quickly (not because I didn’t feel good on it, but because I was bored AF with such a limited palette to choose from—especially as someone who doesn’t eat meat), but some of its key ingredients and general approach to macronutrients stuck. And so, this lasagna was born.

We can sit here and categorize this zucchini noodle lasagna however much we want: Keto, paleo, vegetarian, low-carb, gluten-free, grain-free, sugar-free (…and yes it is all of those things). We can debate about whether or not it’s actually lasagna. At the end of the day, it’s real food—90% or so from the earth—with diverse and dense nutrients and amazing flavor. 

Food politics and preferences aside, my hope is that you will love the taste and the experience of eating it as much as your body will feel nourished from it afterwards. <3

basil.jpg
zucchini_noodles.jpg
mushroom_saute.jpg
golden_mushrooms.jpg
lasagna_areal2.jpg

Zucchini Noodle Lasagna with Oyster Mushrooms, Basil & Swiss Chard
Serves 3-4

Ingredients
1 large or 2 medium zucchini
1/2 tablespoon sea salt (to be drawn from at various points)
1 tablespoon ghee or avocado oil
1.5 ounces oyster mushrooms (basically two large handfuls)
1 teaspoon extra virgin olive oil
2 cloves garlic, minced
1 bunch Swiss chard, de-stemmed, rinsed and torn into 2”-ish pieces (okay to leave it a bit wet)
1 (28-ounce) can crushed tomatoes (organic if possible - tomatoes are heavily sprayed with pesticides)
1/4 cup tomato paste (same as above)
1 tablespoon balsamic vinegar
3 sprigs basil, leaves removed from stems
2 (8-ounce) fresh mozzarella balls, torn into thin pieces

Also:
4-5 sheets paper towels
Mesh strainer
A loaf pan
Tongs - helpful, but not essential

Directions
1. Preheat the oven to 400°F.
2. Cut the knob off the end of the zucchini. With a very sharp knife or a mandolin slicer, slice the zucchini lengthwise into 1/4” thick strips. Lay the strips flat on a few paper towels (I lay the towels on a large cutting board) without overlapping and sprinkle generously with salt. (The salt draws out the water in the zucchini, which will make it less soggy when it bakes.) Set aside.
3. In a large skillet over medium high heat, warm the ghee or avocado oil until it sizzles when sprinkled with water. Add oyster mushrooms and a generous pinch of salt. Toss the mushrooms (with tongs if you have them!) until they’re well coated in the oil. Spread them out so as much of their surface area is in contact with the pan as possible and let sit, undisturbed, for a few minutes until golden. Flip and cook the other sides. When they’re nice and golden all around, transfer to a plate and set aside.
4. Reduce the heat to low and add the teaspoon of olive oil, followed by the minced garlic. Sauté garlic until browning, about one minute. Add chard and a generous pinch of salt. Sauté until wilted, about three minutes. You may need to cook it in batches depending on the size of your pan. When wilted, transfer to a plate and set aside.
5. Pour the crushed tomatoes into a mesh strainer and strain out most of the excess liquid. Transfer to a mixing bowl, add balsamic vinegar, tomato paste and 1/4 teaspoon salt, and stir to combine.
6. Return to your zucchini noodles. Using a paper towel, dab off any moisture that has beaded out of the zucchini until it looks relatively dry.
7. Assembly time! Spread a thin base layer of the crushed tomato mixture on the bottom of the loaf pan. Cover the surface area on top of the sauce with rows of zucchini (you will need to cut the strips into various lengths to make this work). Layer on chard, mushrooms, whole basil leaves, sauce and mozzarella, followed by the next layer of zucchini noodles and all the fillings again. (I like to put the mozzarella next to the zucchini because it acts kind of like glue, but you can layer them in whatever order you like!). Finish off with a layer of zucchini, followed by sauce and mozzarella.
8. Bake until bubbling and the cheese on top is golden, about 30 minutes. Enjoy!

Spring Green Veggie & Herb Lettuce Cups

lettucecups1.jpg
asparagus1.jpg
englishpea.jpg

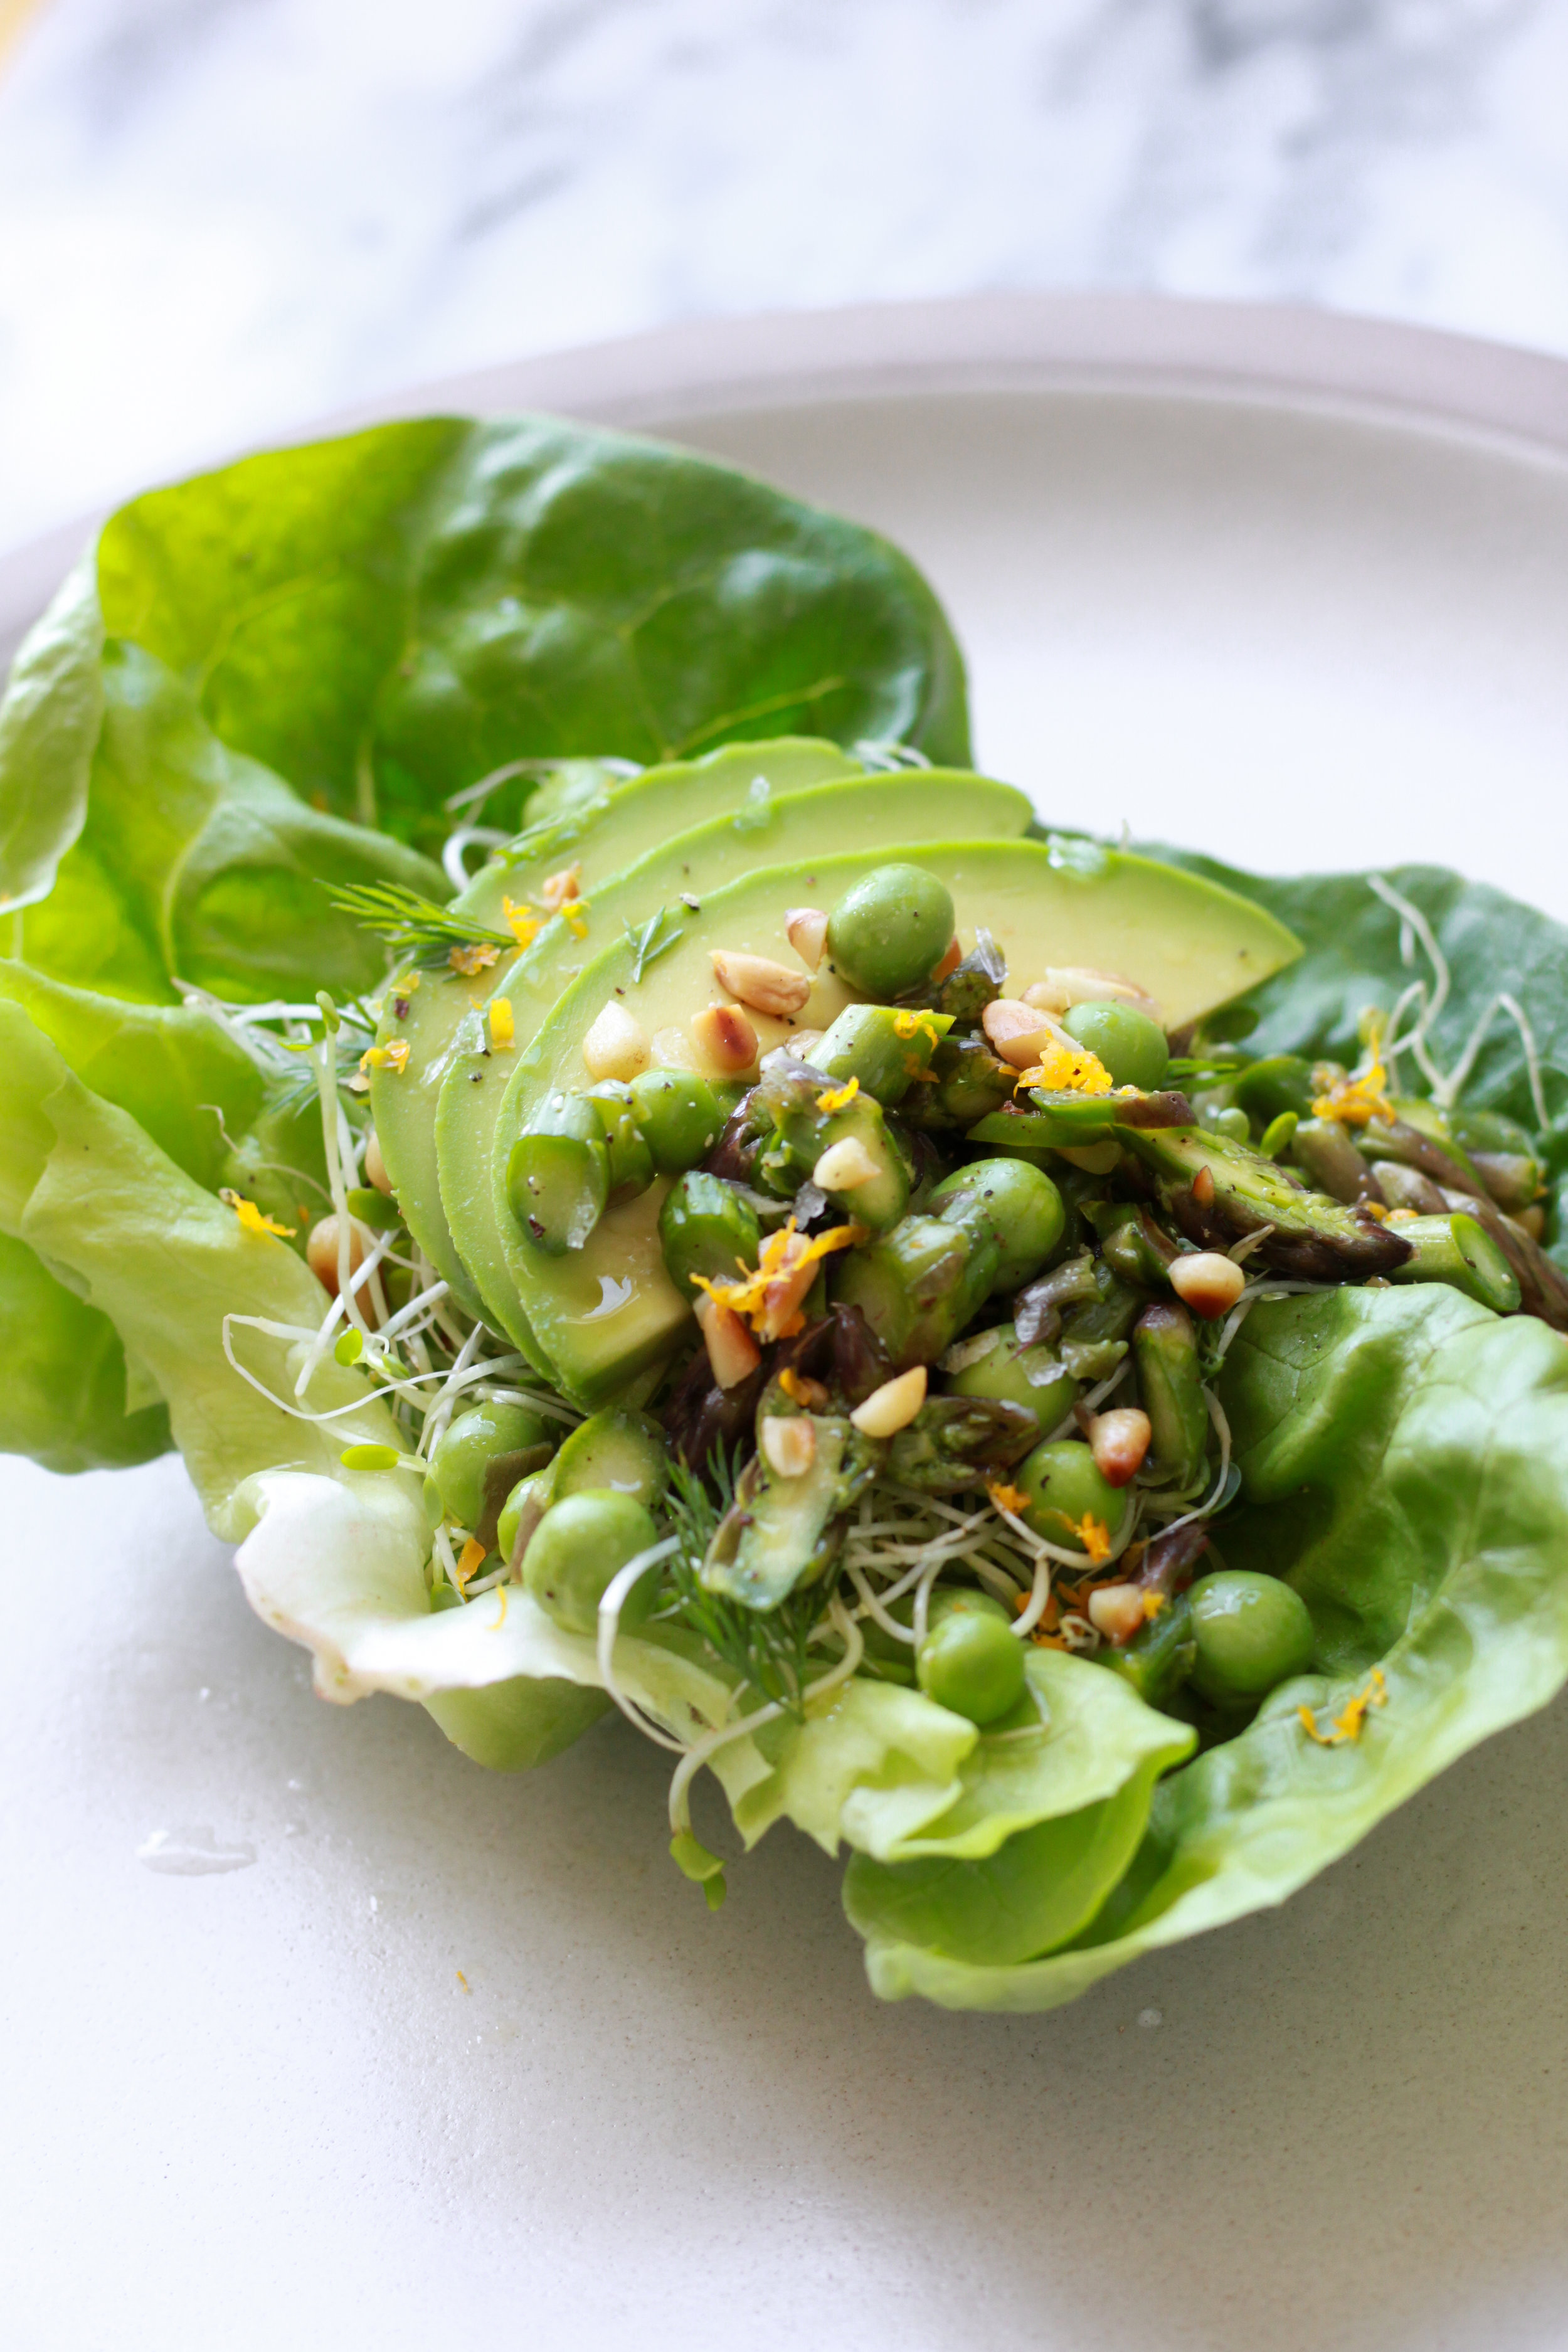
Super simple and fresh, this is essentially a handheld salad that celebrates the early bounties of spring.

I opted to stick with lemon and olive oil for the dressing to let the brightness of the vegetables shine through; if you’re keen to douse the lettuce cups in tahini or have a green goddess or other dressing that you like, definitely do!

Great as a side dish, these lettuce cups can easily become a full meal by mixing in some flaked salmon, chickpeas or other protein of choice. Happy spring!

untitled (6 of 11).jpg
asparagus2.jpg
lettucecup2.jpg
lettucecup3.jpg
lettucecups_duo.jpg

Spring Green Veggie & Herb Lettuce Cups
Makes 4 lettuce cups

Ingredients
1/2 bunch asparagus
1/2 lb English peas (in their pod)
1 Meyer lemon
2 Tbsp. pine nuts
2 Tbsp. olive oil
1/4 cup mixed herbs (mint, dill, chives, parsley, chervil are some nice options), roughly chopped
1 avocado, sliced
a few handfuls alfalfa sprouts
4 large butter lettuce leaves
salt & pepper

Directions
1. Cut off the bottom woody ends off the asparagus (1”-2” up from the bottom) and discard. Cut each asparagus stalk into 1/4” slivers at an angle and put into a medium sized bowl.
2. Zest the lemon and set zest aside. Squeeze the juice from the entire lemon over the asparagus. Add a couple pinches of salt, toss and set aside.
3. De-pod the English peas, adding the peas to the bowl with the asparagus as you go. Mix the two together.
4. In a small pan, toast the pine nuts over medium-low heat until golden brown, 5-7 minutes, stirring or tossing frequently. Once they’re golden, transfer immediately to a cutting board so they don’t burn. Roughly chop.
5. Add the olive oil, lemon zest, 3 Tbsp. of the chopped herbs and a few grinds of black pepper to the asparagus and peas. Stir to combine. Taste and adjust salt and pepper as needed.
6. Assemble the lettuce cups: In each butter lettuce leaf, place a layer of alfalfa sprouts, slices from 1/4 the avocado, and a couple spoonfuls of the asparagus and pea mixture (and its lemon-oil-herb dressing). Finish off with a few pinches of chopped pine nuts and the remaining fresh herbs.

Vegan Turmeric Eggnog

turmericeggnog.jpg
eggnog_ingredients.jpg
nutmeg.jpg

I had the pleasure of co-developing this recipe for a project at work and got to make and share it with our entire team (definitely snag Navitas Organics Turmeric Powder and Cashews for this if you can; they’re amazing quality—and I’m not just saying that because I work there!).

Eggnog has loooong been a favorite of mine, but since becoming health-aware and vigilant about checking the ingredients in processed foods, I steer pretty clear of the stuff sold in grocery stores (which is, most often, insanely high in sugar if not also full of junky ingredients).

The added bonus about this recipe is that it is vegan—so everyone can enjoy it—and is refined sugar-free without compromising any of the thick, luscious texture or sweet, nutmeg-y flavor! The taste of the turmeric is subtle but adds a bright golden color and anti-inflammatory benefits, which certainly never hurt this time of year.

pour.jpg
eggnog_areal.jpg

Vegan Turmeric Eggnog
slightly adapted from Will Frolic for Food
serves 2-3

Ingredients
I Cup raw cashews, preferably soaked 4 hours 
4 Medjool dates, pitted
¼ tsp. freshly grated nutmeg 
¼ tsp. cinnamon 
¼ tsp. cardamom 
¼ tsp. turmeric powder
¼ tsp. vanilla extract or paste 
pinch of sea salt 
grind of black pepper 
3 Cups water, hot but not boiling 

Directions
1. Add all ingredients to a high speed blender.
2 Blend on low and then increase to high until smooth and creamy. Garnish with extra cinnamon or nutmeg. Enjoy!

Roasted Broccolini with Browned Butter Tahini Sauce & Za'atar

untitled (1 of 1)-2.jpg
untitled (3 of 12).jpg
untitled (4 of 12).jpg
zaatar1.jpg
zaatar2.jpg
butter.jpg

I have been SUPER into roasting broccolini lately, mostly because of how dang easy it is. You literally don’t have to do anything but cut off a bit of the bottoms, toss them in a high-heat oil (refined coconut or avocado oil), season with salt and pepper and BAM, into the oven they go! No peeling, no chopping, no salting and waiting to draw out the excess water…it literally could not be any easier. Add a sauce rich in healthy fats (like the one in this recipe), maybe some hemp seeds, nuts or beans for protein and voilà, you’ve got yourself a meal! Sometimes low maintenance is just what life requires.

For such a simple recipe, this roasted broccolini packs a flavor punch. It makes for a great side dish at special meals and can just as well be eaten for lunch on any given weekday.

Use whole sesame tahini if you’re able (this is my favorite brand). If you’re unfamiliar with tahini or that there are different types out there, you can read up on the amazing ingredient here!

Za’atar is a Middle Eastern spice blend made out of sumac, sesame seeds, thyme and salt. You can totally make your own, or purchase it from a Middle Eastern market or specialty spice shop. I get mine from this local cafe in Berkeley called Bartavelle because it’s the best za’atar I’ve ever had in my life, so. Thanks, Bartavelle! This recipe is also absolutely delicious using roasted Brussels sprouts instead of broccolini. I make both on a regular basis. Go with what your gut tells you :).

untitled (11 of 12).jpg
untitled (12 of 12).jpg

Roasted Broccolini with Browned Butter Tahini Sauce & Za’atar
Serves two hungry people or four as a side

Ingredients
1 bunch broccolini
1 Tbsp. avocado oil, coconut oil or ghee
2 Tbsp. butter (organic & pastured/grass-fed, if possible)
1/4 cup tahini
1/2 Tbsp. lemon juice, fresh squeezed
small clove of garlic, grated on a microplane
1/2 Tbsp. za’atar
sea salt & pepper

Directions
1. Preheat the oven to 400°F. Trim the bottom 1/4” of the stems off the broccolini. Toss in oil (you can rub it with your hands if it’s not melted) and season generously with salt and pepper. Lay on a baking sheet lined with parchment paper, spreading out the broccolini so that they aren’t overlapping.
2. Roast broccolini for 6-8 minutes, until browning on the bottom. Flip the stalks over on the tray and roast for another 4-6 minutes, until tender.
3. Meanwhile, make the sauce. Melt the butter in a small saucepan on medium-low heat. Swirl the pot consistently as the butter begins to bubble to prevent it from burning. As soon as the butter turns an amber color and brown flecks begin to develop on the bottom of the pot, remove it from the heat. Pour the butter into a heat-proof jar with a lid, using a spatula to scrape all the browned bits into it too.
4. Add the tahini, lemon juice, grated garlic and a hefty pinch of salt to the jar. Shake vigorously. Taste and adjust lemon and salt as needed.
5. Place roasted broccolini on a serving plate. Pour sauce over the broccolini in whatever way your heart desires. Sprinkle evenly with za’atar. Serve immediately.*

*Note: Because butter is solid when cold, this sauce will become very thick once it cools. If you have any sauce leftover, reheat it before using. Alternatively, add water (1 Tbsp. at a time, so as to not compromise the consistency) and shake vigorously until the sauce reaches the consistency of runny honey.

Pickled Peach, Burrata & Pea Shoot Salad with Creamy Basil Hemp Dressing

IMG_6347-1.jpg
IMG_6237-3.jpg
IMG_6303-5.jpg
IMG_6293-4.jpg

Yikes, September! I'm squeezing in this summery salad as the darkness is setting upon our days a little earlier and the evenings are marked with the beginnings of chill. Hopefully you still have peaches at your farmers market or local grocer! (In California, we're spoiled.)

This is a truly simple salad that presents itself as fancy AF. The sweet-tang of the pickled peaches plays well off the creaminess of the burrata, crunch of the pepitas and brightness of the sprouts and herb-y dressing.

The dressing, made creamy thanks to the small yet mighty hemp seeds, is packed with essential omega-3 and omega-6 fatty acids AND contributes complete protein to the dish! Hemp seeds are actually a nutritionally amazing food, y'all. Peaches can be pickled a couple days in advance. Enjoy!

IMG_6185-6.jpg
IMG_6202-7.jpg
IMG_6312-8.jpg
close1 (1 of 1).jpg
areal1 (1 of 1).jpg

Pickled Peach, Burrata & Pea Shoot Salad with Creamy Basil Hemp Dressing
Serves four

Ingredients
Pickled Peaches
1 large yellow peach, slightly firm, sliced into 12 wedges
1 cup apple cider vinegar
1/3 cup raw honey
1/2 Tbsp. Kosher salt
1 bay leaf
1 cinnamon stick
5 whole cloves
16oz Mason jar and lid, preferably with a wide mouth

Creamy Basil Hemp Dressing
1/2 cup hemp seeds
6 large basil leaves
2 Tbsp. lemon juice
1/2 Tbsp. cold-pressed olive oil
1/2 Tbsp. apple cider vinegar
1 giant pinch salt

Toasted Pepitas (Pumpkin Seeds)
1/4 cup raw pepitas

Salad
1 container pea shoots
2 burrata balls
12 slices pickled peaches (recipe above)
Creamy Basil Hemp Dressing (recipe above)
Salt & pepper, to serve

Directions
1. Make the pickled peaches: In a small pot, combine all the pickled peach ingredients except the peaches. Bring to a boil, reduce to a simmer and stir occasionally until the honey and salt are fully dissolved. Let cool 10 minutes. While the brine is cooling, squeeze the peach wedges in the Mason jar. Pour the brine over the peaches, cover, and let stand at least 20 minutes.*
2. Make the dressing: In a high speed blender, pour 1/2 cup of filtered water and add all the dressing ingredients. Start blending on low, increase to high and blend until all the ingredients have become emulsified and smooth. Taste; add salt if necessary.
3. Toast the pepitas: In a dry frying pan (i.e., without oil), toast the pepitas over medium heat for about 5 minutes, flipping occasionally via shaking the pan. Pull from the heat as soon as they become aromatic and start to make intermittent popping sounds. Transfer to a plate to cool.
3. Assemble the salad: Layer handfuls of pea shoots, torn bits of burrata and a few pickled peaches on each plate. Pour dressing over the salad. Top with toasted pepitas, a pinch of salt and freshly ground pepper.

*Store pickled peaches in refrigerator if you make them in advance or have leftovers.

Rosemary Honey Cashew Butter | An Ode to Homemade, Edible Gifts

RosemaryCashew1
CashewButter2

For a brief yet impressing moment in time, I thought about starting a nut butter company. That was certainly one of the biggest curve balls of my life to date: coming out of a year devoted to completing my Masters in Contemporary Art Theory with a desire to become a fancy flavored nut butter entrepreneur.

It made as much sense to me – in context of my life at the time – as it was absolutely crazy. The part that made sense was this: Making nut butter from scratch was one of the most magical endeavors I undertook that year, during which I not only achieved my MA but also taught myself how to cook. Witnessing the nuts transform from solid to liquid astounded me, their natural oils releasing and completely altering their physical composition due to nothing more than an aggressively spinning blade. (Clearly I had no idea how much oil nuts contain.) What's more, it felt empowering. This food product that I had understood comes from a jar at the supermarket much the way an apple comes from the branch of an apple tree, I could make at home?! This meant I could not only control the quality of the nut butter but also the additional ingredients that defined it. The opportunities for creative deliciousness were endless! Maple cinnamon almond butter! Chai spice pecan butter! Or even something sweet and herbal, like...rosemary honey cashew butter.  

The part that was absolutely crazy about my nut butter entrepreneur pipe dream was, well, everything else.

Cashews
Rosemary
Honey

All of the holiday gifts I gave that year were food related. Educational. Homemade. I wrote out instructions for my parents (on graph paper with a wealth of colored pens) on how to make my favorite Oilve Oil and Maple Granola – customizable and refined sugar-free! – along with a "voucher" for a lesson where we would make it together. I made variety after variety of nut butter, some based on my preferences and some based on theirs. The gifts may have taken a bit more time than purchasing things online, but I could tell that they were deeply appreciated and meaningful. Unique. Imbued with creativity and care. 

The other great thing about gifting nut butter is that, if you are looking to give small gifts to many people, you can make a big batch with no more effort than making a small batch! Just saying.

While my dream of bringing inspired nut butters to foodies everywhere eventually fell by the wayside, I would be remiss to not mention that when I gave my former housemate a taste of this Rosemary Honey Cashew Butter the first time I made it, she literally freaked out and insisted that I start selling it at farmers markets immediately.  Even if you're skeptical and rosemary is not typically your thing, I encourage you to approach this one with an open mind. You may just find yourself surprised.

I hope everyone has a joyful and delicious holiday season – one that is nourishing in every sense of the word. Take time for yourself when you need it. Relish the sweets and listen to your body so you know when you should maybe ease up a little (that's, erm, some advice to myself that I thought maybe some of you may also relate to). Stretch in the mornings. Return to your breath in stressful times. Sink into the beauty of the season, in actions, words and things. Take good care. 

Blitz1
Blitz2
Blitz3
Blitz4
CashewButter4

Rosemary-Honey Cashew Butter
Makes about 1 cup.  Scale up for a larger batch.
Originally published on my 2012 blog, which I am not linking to because looking at it is like looking at your old yearbook photos, but which I am mentioning because, citations. 

Ingredients
2 cups raw cashews
2 tsp. fresh rosemary
2 tsp. raw honey
1/2 tsp. fine sea salt or pink Himalayan salt
1 tsp. cold-pressed sunflower oil, optional (for more runny cashew butter; it is quite thick otherwise)

Directions
1.  Preheat oven to 300°F.
2.  Spread cashews on a baking sheet and roast for 15-20 minutes, until fragrant. Stir a few times during roasting.
3.  Let cool for 5 minutes.
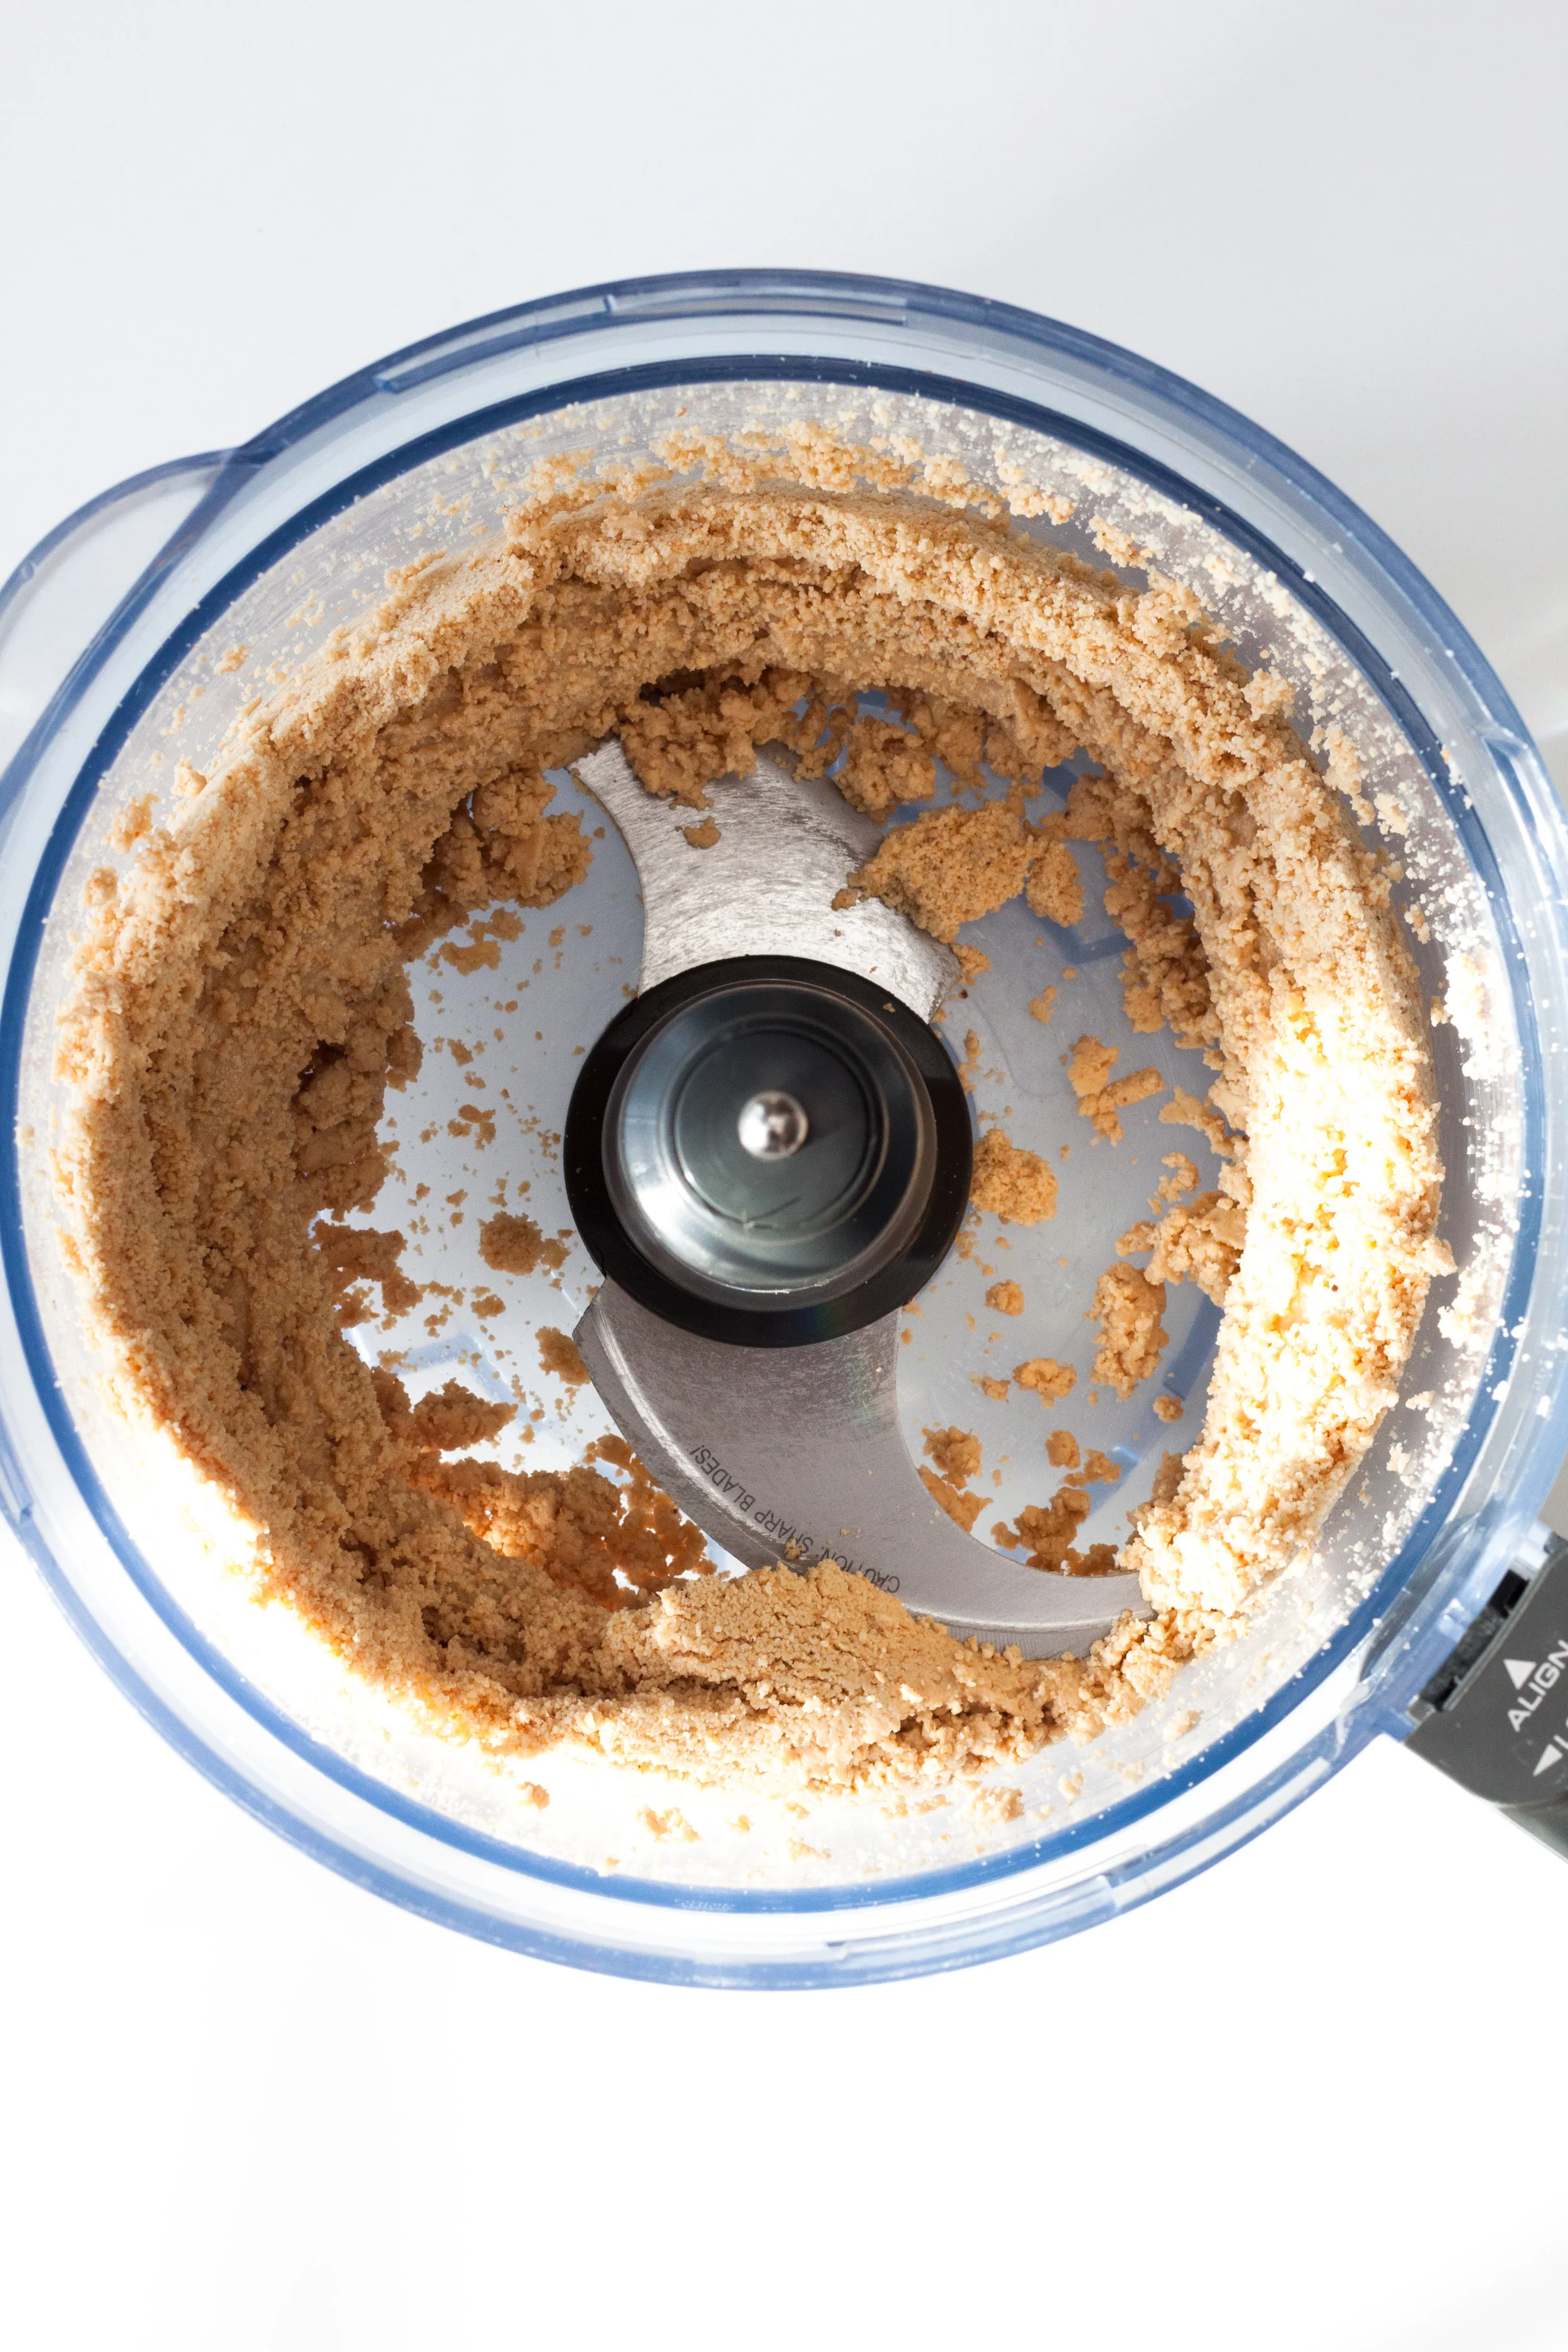
4.  Place cashews in food processor fitted with an S-blade and blend until the nuts turn into a smooth 'butter'. This could take anywhere from 5-15 minutes. Scrape down the sides of the bowl as needed.
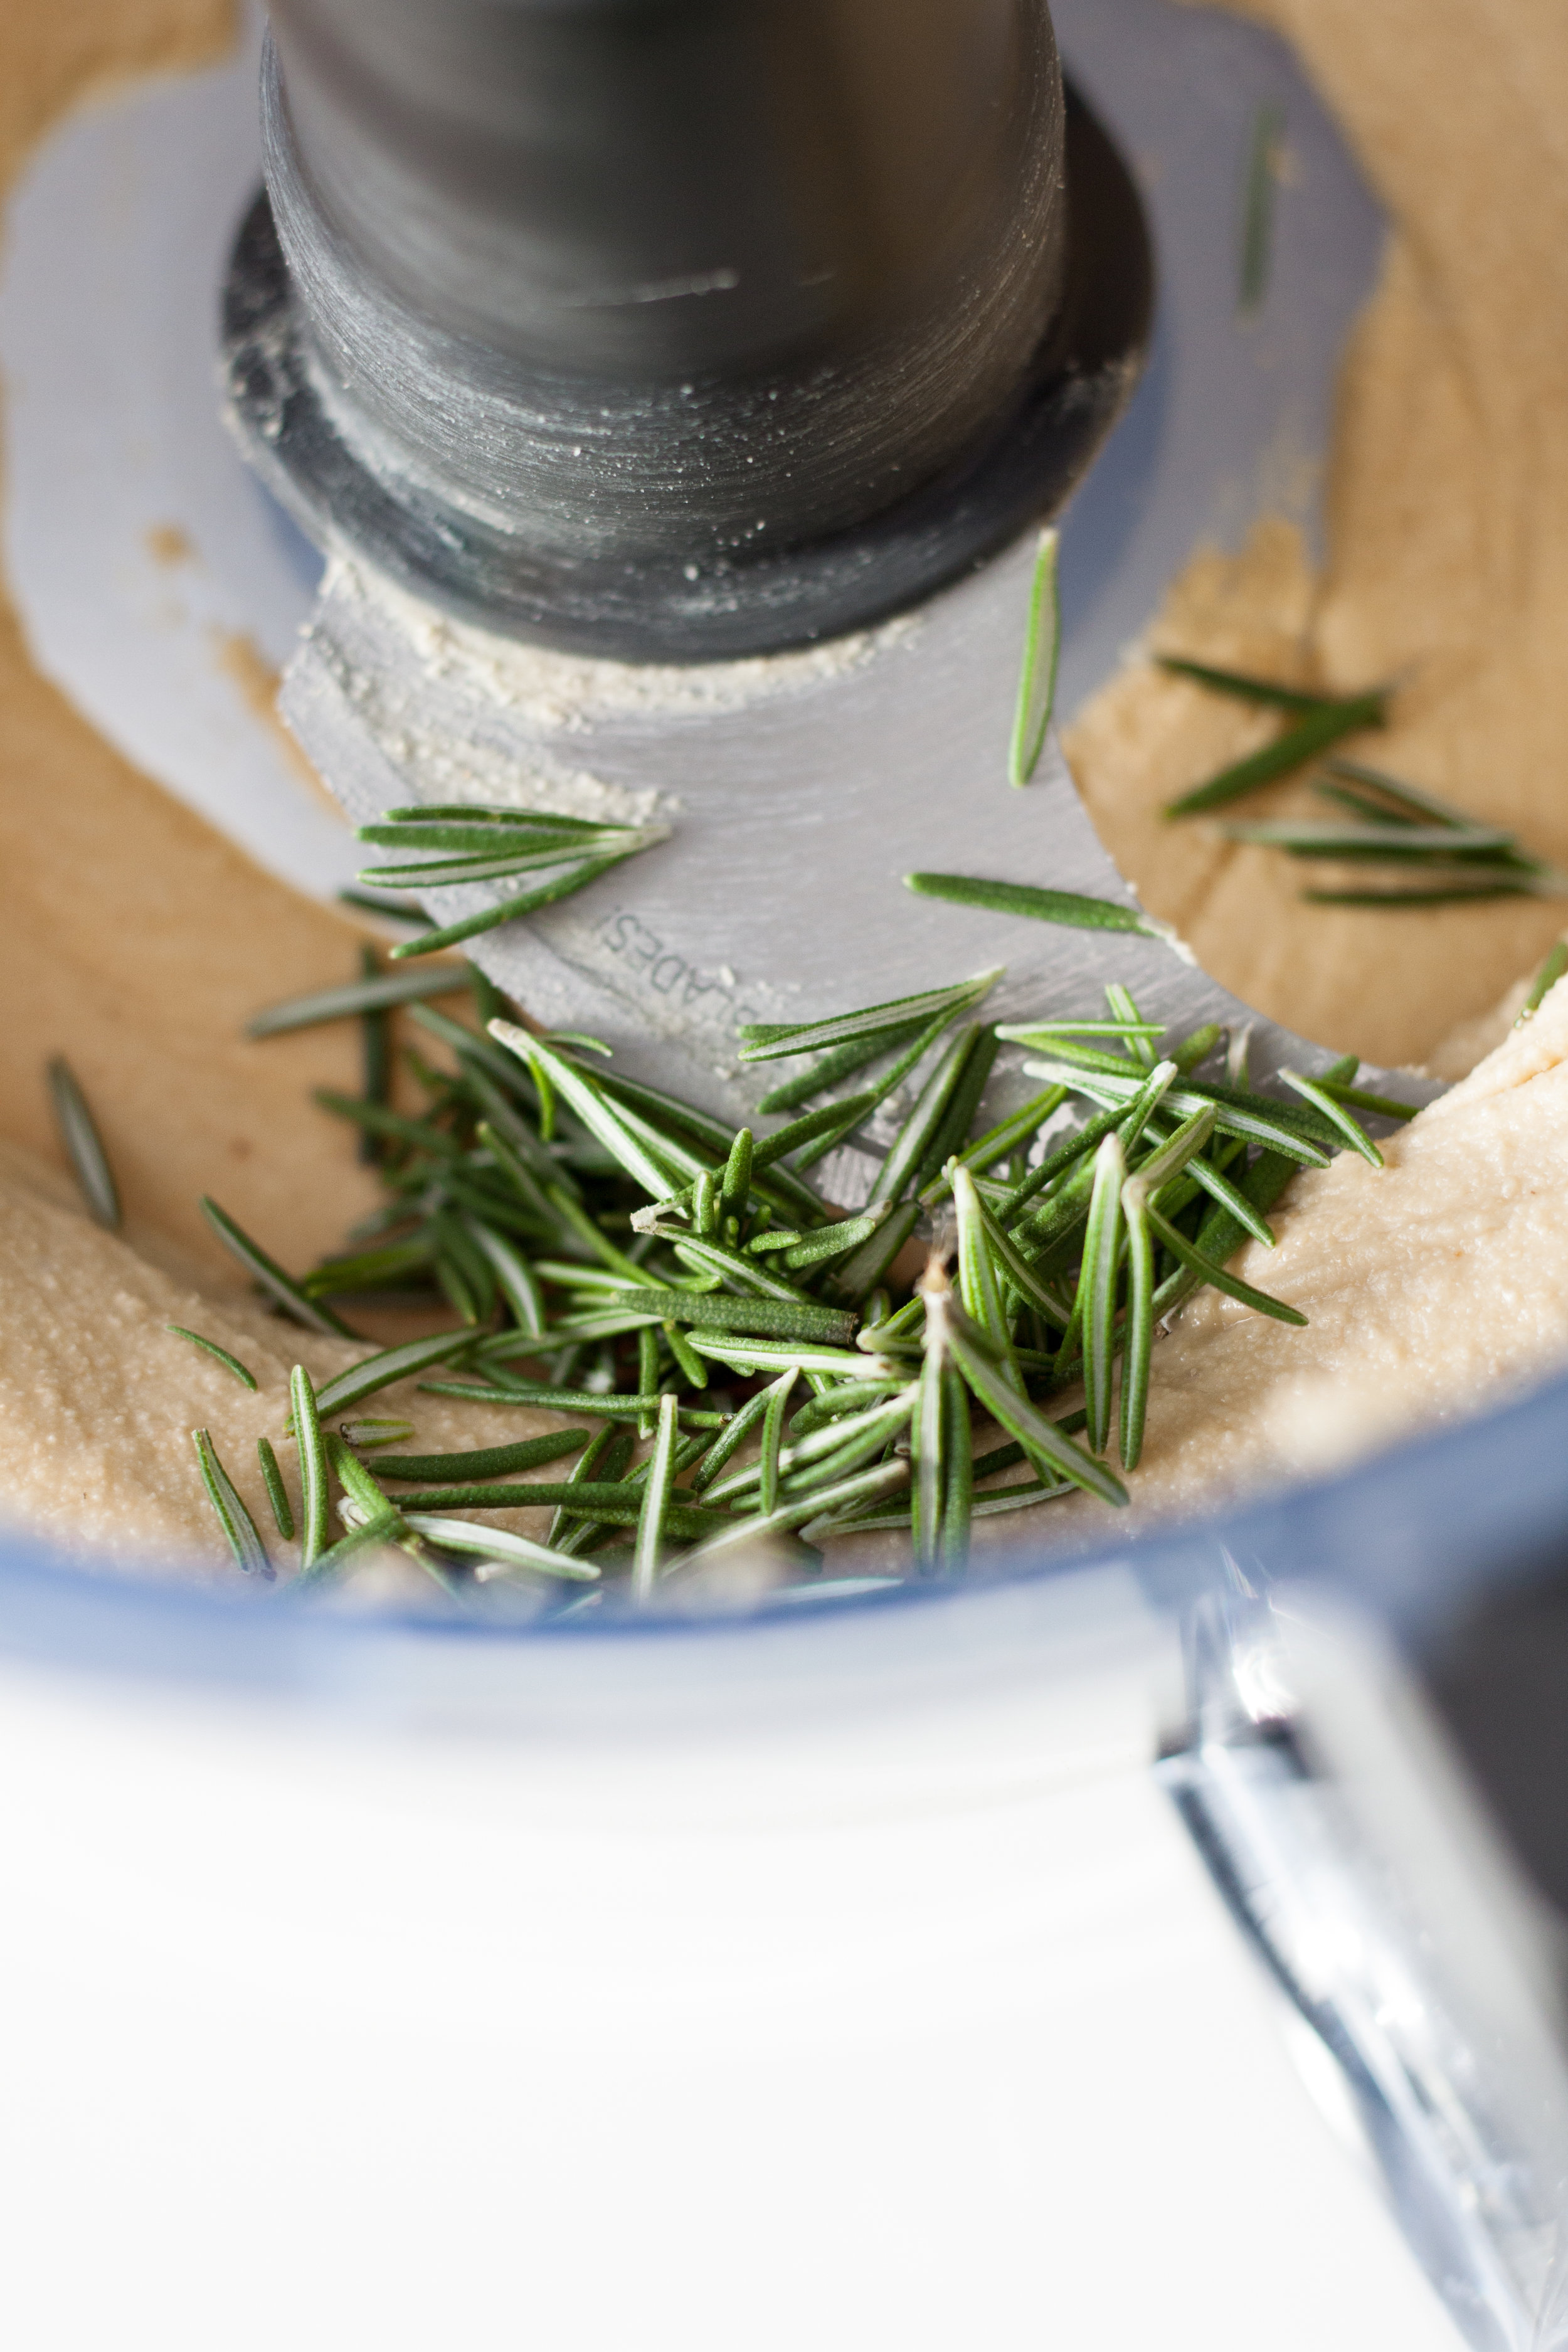
5.  Add rosemary and salt and process for another minute or two.
6.  In a small saucepan, melt honey over low heat until it is completely liquefied – much thinner than its syrupy state. Add to nut butter and process for another minute until fully combined. The nut butter will clump up again; keep the blade running until it returns to its smooth state.
7.  If you prefer your cashew butter even creamier, add the 1 tsp. of a sunflower oil.
8.  Carefully remove blade from food processor. Transfer nut butter to a glass jar with a lid and store in the fridge.

Blistered Snap Peas with Miso Butter

IMG_5482.jpg
IMG_5444.jpg
IMG_5535.jpg

In all honesty, this is kind of a non-recipe—which is often what summer calls for, when produce is bountiful and flavorful even with little to no preparation. It’s a recipe for those times when you’d rather be outside than in your kitchen, or taking your kitchen outside (to the grill).

This recipe is simply charred snap peas slathered in miso butter—which is miso paste mixed with butter. Simple, simple, simple but whooooa is it delicious. I made it in a cast iron pan because I don’t have a grill, but if you do have a grill, go ahead and throw the snap peas in a grill basket and go to town. It’s the perfect appetizer for a low key evening of entertaining or side dish to a weekday meal.

IMG_5563.jpg
IMG_5587.jpg

Blistered Snap Peas with Miso Butter
Serves 4 as a starter or 2-3 as a side

Ingredients
1 lb. snap peas, woody ends cut off
3 Tbsp. room temp butter, organic and pastured if possible
1 Tbsp. sweet white or mellow yellow miso paste
flaky salt and freshly ground pepper

Directions
1. If you have a grill, place the snap peas in a grill basket and grill until blistered. If not, heat a cast iron skillet on medium high. Place a third of the snap peas into the skillet and, using tongs, spread them out so that each snap pea is touching the surface of the pan. Cook until blistered, about 2 minutes, then flip and cook the other side for 1 minute. Repeat with remaining snap peas.
2. In a small container, cream the miso together with the room temperature butter. You will have leftovers (you're welcome).
3. Take a generous spoonful of the miso butter and slather over the warm snap peas. Finish off with a generous pinch of flaky salt and freshly ground black pepper.

Heirloom Tomato, Apricot & Cucumber Salad with Yogurt & Za'atar

OH HEY, IT'S SUMMER! This basically means you don't have to cook at all if you don't want to, because everything is luscious and ripe and can be sunk into off the vine with your teeth (no silverware necessary).

This salad is a celebration of the ease of summer eating and the inherent vibrant flavors that make the produce this time of year shine. It is a cooling salad with some Middle Eastern vibes because they're my favorite (full disclosure of cuisine bias here). The one ingredient with which you may be unfamiliar is za'atar, which is a Middle Eastern spice blend made of thyme, oregano, sesame seeds, sumac and salt. It's delicious! You can make your own or buy a jar at specialty spice shops or Middle Eastern markets.

I've also used unusual varieties of cucumbers and tomatoes here because they're fun and you can only get them during the summer! If you can't find them, don't sweat it; a normal, ripe, preferably relatively local cucumber or tomato will do the trick just as well. Enjoy!

Heirloom Tomato, Apricot & Cucumber Salad with Yogurt & Za'atar
Serves four as a starter or two as a main

Ingredients
3 medium heirloom tomatoes, cut into large wedges
4 apricots, pit removed and cut into quarters
1 avocado, cut into 1/2" cubes
2 lemon cucumbers or 1 painted serpent cucumber (or 2 Persian cucumbers, failing those), cut into 1" chunks
6 Tbsp. plain whole milk Greek yogurt
1 Tbsp. good quality cold-pressed olive oil, plus more for drizzling
2 Tbsp. mint, roughly chopped
2 Tbsp. dill fronds
1 lemon
1 Tbsp. za'atar
salt + pepper

Directions
1. In a small bowl, mix together the Greek yogurt, 1 Tbsp. olive oil and a pinch of salt.
2. Spread the yogurt mixture on the bottom of your serving platter.
3. Arrange the slices of tomato, avocado, apricot and cucumber together on top of the yogurt. Scatter herbs and za'atar on top.
4. Finish off with a generous drizzle of olive oil, the juice of half a lemon, salt and pepper. Adjust to taste.

Lemony Fava Bean Tartine

IMG_4108.jpg

This is a super simple celebration of spring. As the bounties of the season begin to pour in, we are blessed with vibrant and delicious produce that often requires little to no cooking. I also love the revelations that come with tasting fresh foods straight from the pod or the cob that you might eat from frozen at other times during the year; there is no comparison! Fava beans are less common in the standard American diet than, say, peas, which is a shame because they are suuuuper delicious. They also happen to be crazy nutrient dense, containing an array of vitamins (folate, thiamine, vitamin K, vitamin B6) and minerals (iron, manganese, potassium, copper, zinc, magnesium) in addition to fiber and protein! 

I used dill and tarragon in this recipe because I seem to perpetually have leftovers of those herbs in my fridge as of late. This would also be delicious with mint, basil, chives, chervil, parsley, or some combination thereof. You can have it on toast or off; with an egg or without. The basic equation here is fava beans + herbs + lemon = yum. It's pretty much that simple.

Lemony Fava Bean Tartine
Makes two toasts

Ingredients
1 1/2 cup fava beans (from about 1 lb. favas-in-the-pod)
1 unwaxed, organic lemon, zested
1 1/2 Tbsp. fresh squeezed lemon juice
3 Tbsp. cold-pressed, good quality olive oil
1/8 tsp. pink or sea salt
2 handfuls pea shoots
1 Tbsp. dill fronds, fresh
1 Tbsp. tarragon leaves, fresh
Two slices whole grain or country sourdough
Soft boiled egg (or cooked to preference)
Fresh ground pepper, to finish

Directions
1. Bring a medium pot of water to a boil. Fill a medium bowl with ice water and set aside. Cook fava beans in the boiling water for 1 minute, then strain and transfer to the ice water. Peel the waxy outer coating from the fava beans.
2. In a medium sized jar with a lid, shake together the lemon zest, lemon juice, olive oil and salt. Add the fava beans to the jar and gently shake to coat.
3. Toast your bread — a toaster is great but a grill pan with some olive oil would be extra delicious.
4. Place one big handful of pea shoots on each toast slice. Pour the favas and their oil on top of the greens (you may have a bit of oil leftover; it makes great salad dressing!). Sprinkle 1/2 Tbsp. of each herb onto each slice. Top with an egg if desired and a few twists of freshly cracked black pepper. Enjoy!

Whole Grain Blueberry Apricot Olive Oil Cake

It’s summer cake time! Light, sweet and brimming with fruit, this cake is perfect for all your snacking and/or summer potluck needs.

In addition to being delicious, this cake has relatively few ingredients, is 100% whole grain and is ridiculously easy to make. It is adapted from this Rhubarb Almond Crumb Cake, which I made for a BBQ last weekend and wasn't totally happy with. I loved the consistency (white whole wheat flour is the WAY TO GO with whole grain baking), but it was overly almond-y and the rhubarb was too sour for my taste. Because I am a perfectionist and because I left that entire cake at the BBQ couldn't handle not having any leftovers for myself/my housemates, I remade it the next day with a few adjustments. Olive oil instead of butter because olive oil cakes feel fancy and are delicious. Apricots and blueberries because SUMMER FRUIT!...that isn't rhubarb. Half the amount of almond extract because balance. I wasn't even planning on sharing it on the blog (hence the lack of process photos/still lives of fruit), but it came out so damn well that I knew I had to.

So here we are!

Whole Grain Blueberry Apricot Olive Oil Cake
Makes one 9" cake

Ingredients
2 eggs
1 cup raw cane sugar
1/2 tsp. pink or sea salt
1/4 tsp. almond extract
6 Tbsp. cold-pressed extra virgin olive oil (the flavor will come through in the cake, so quality olive oil is encouraged!)
1 1/4 cup white whole wheat flour (this is a variety of wheat that is lighter than traditional wheat. You can find it at Trader Joe's or in bulk sections of some health food stores)
1 tsp. baking powder
1 cup fresh blueberries
4 apricots, sliced into 1/8" thick wedges
1/4 cup sliced almonds

Directions
1. Preheat the oven to 350°F. Grease a 9" round baking pan and line the bottom with parchment. Set aside.
2. In a stand mixer fitted with a paddle attachment (or with a vigorous arm), whip together the eggs, sugar, salt and almond extract on medium-high speed until light, fluffy and nearly doubled in volume, about 5 minutes.
3. Mix in olive oil.
4. On a low speed, mix in flour and baking powder until just combined.
5. If using a stand mixer, remove the bowl. Gently fold in blueberries by hand. 
6. Pour batter into prepared baking pan. It will be quite thick; use a spatula to even it out on top.
7. Starting in the middle of the cake, create a spiral with the apricot wedges. Sprinkle the sliced almonds around the perimeter of the cake.
8. Bake for 75-80 minutes, until the top is golden brown and a toothpick stuck in the middle comes out clean.