Black Sesame Tahini Banana Bread

IMG_5850.jpg
IMG_5734.jpg
IMG_5768.jpg
IMG_5784.jpg
mis3.jpg

Banana bread is an American staple. A big time comfort food. Un-fussy, un-pretentious and utterly delicious. But also, it’s basically cake.

This banana bread is not basically cake. It’s whole grain, higher in protein than usual (thanks almond flour! thanks tahini!), and has an incredible crumb and depth of flavor from the tahini…which I’m beginning to be convinced should be added to every baked good ever.

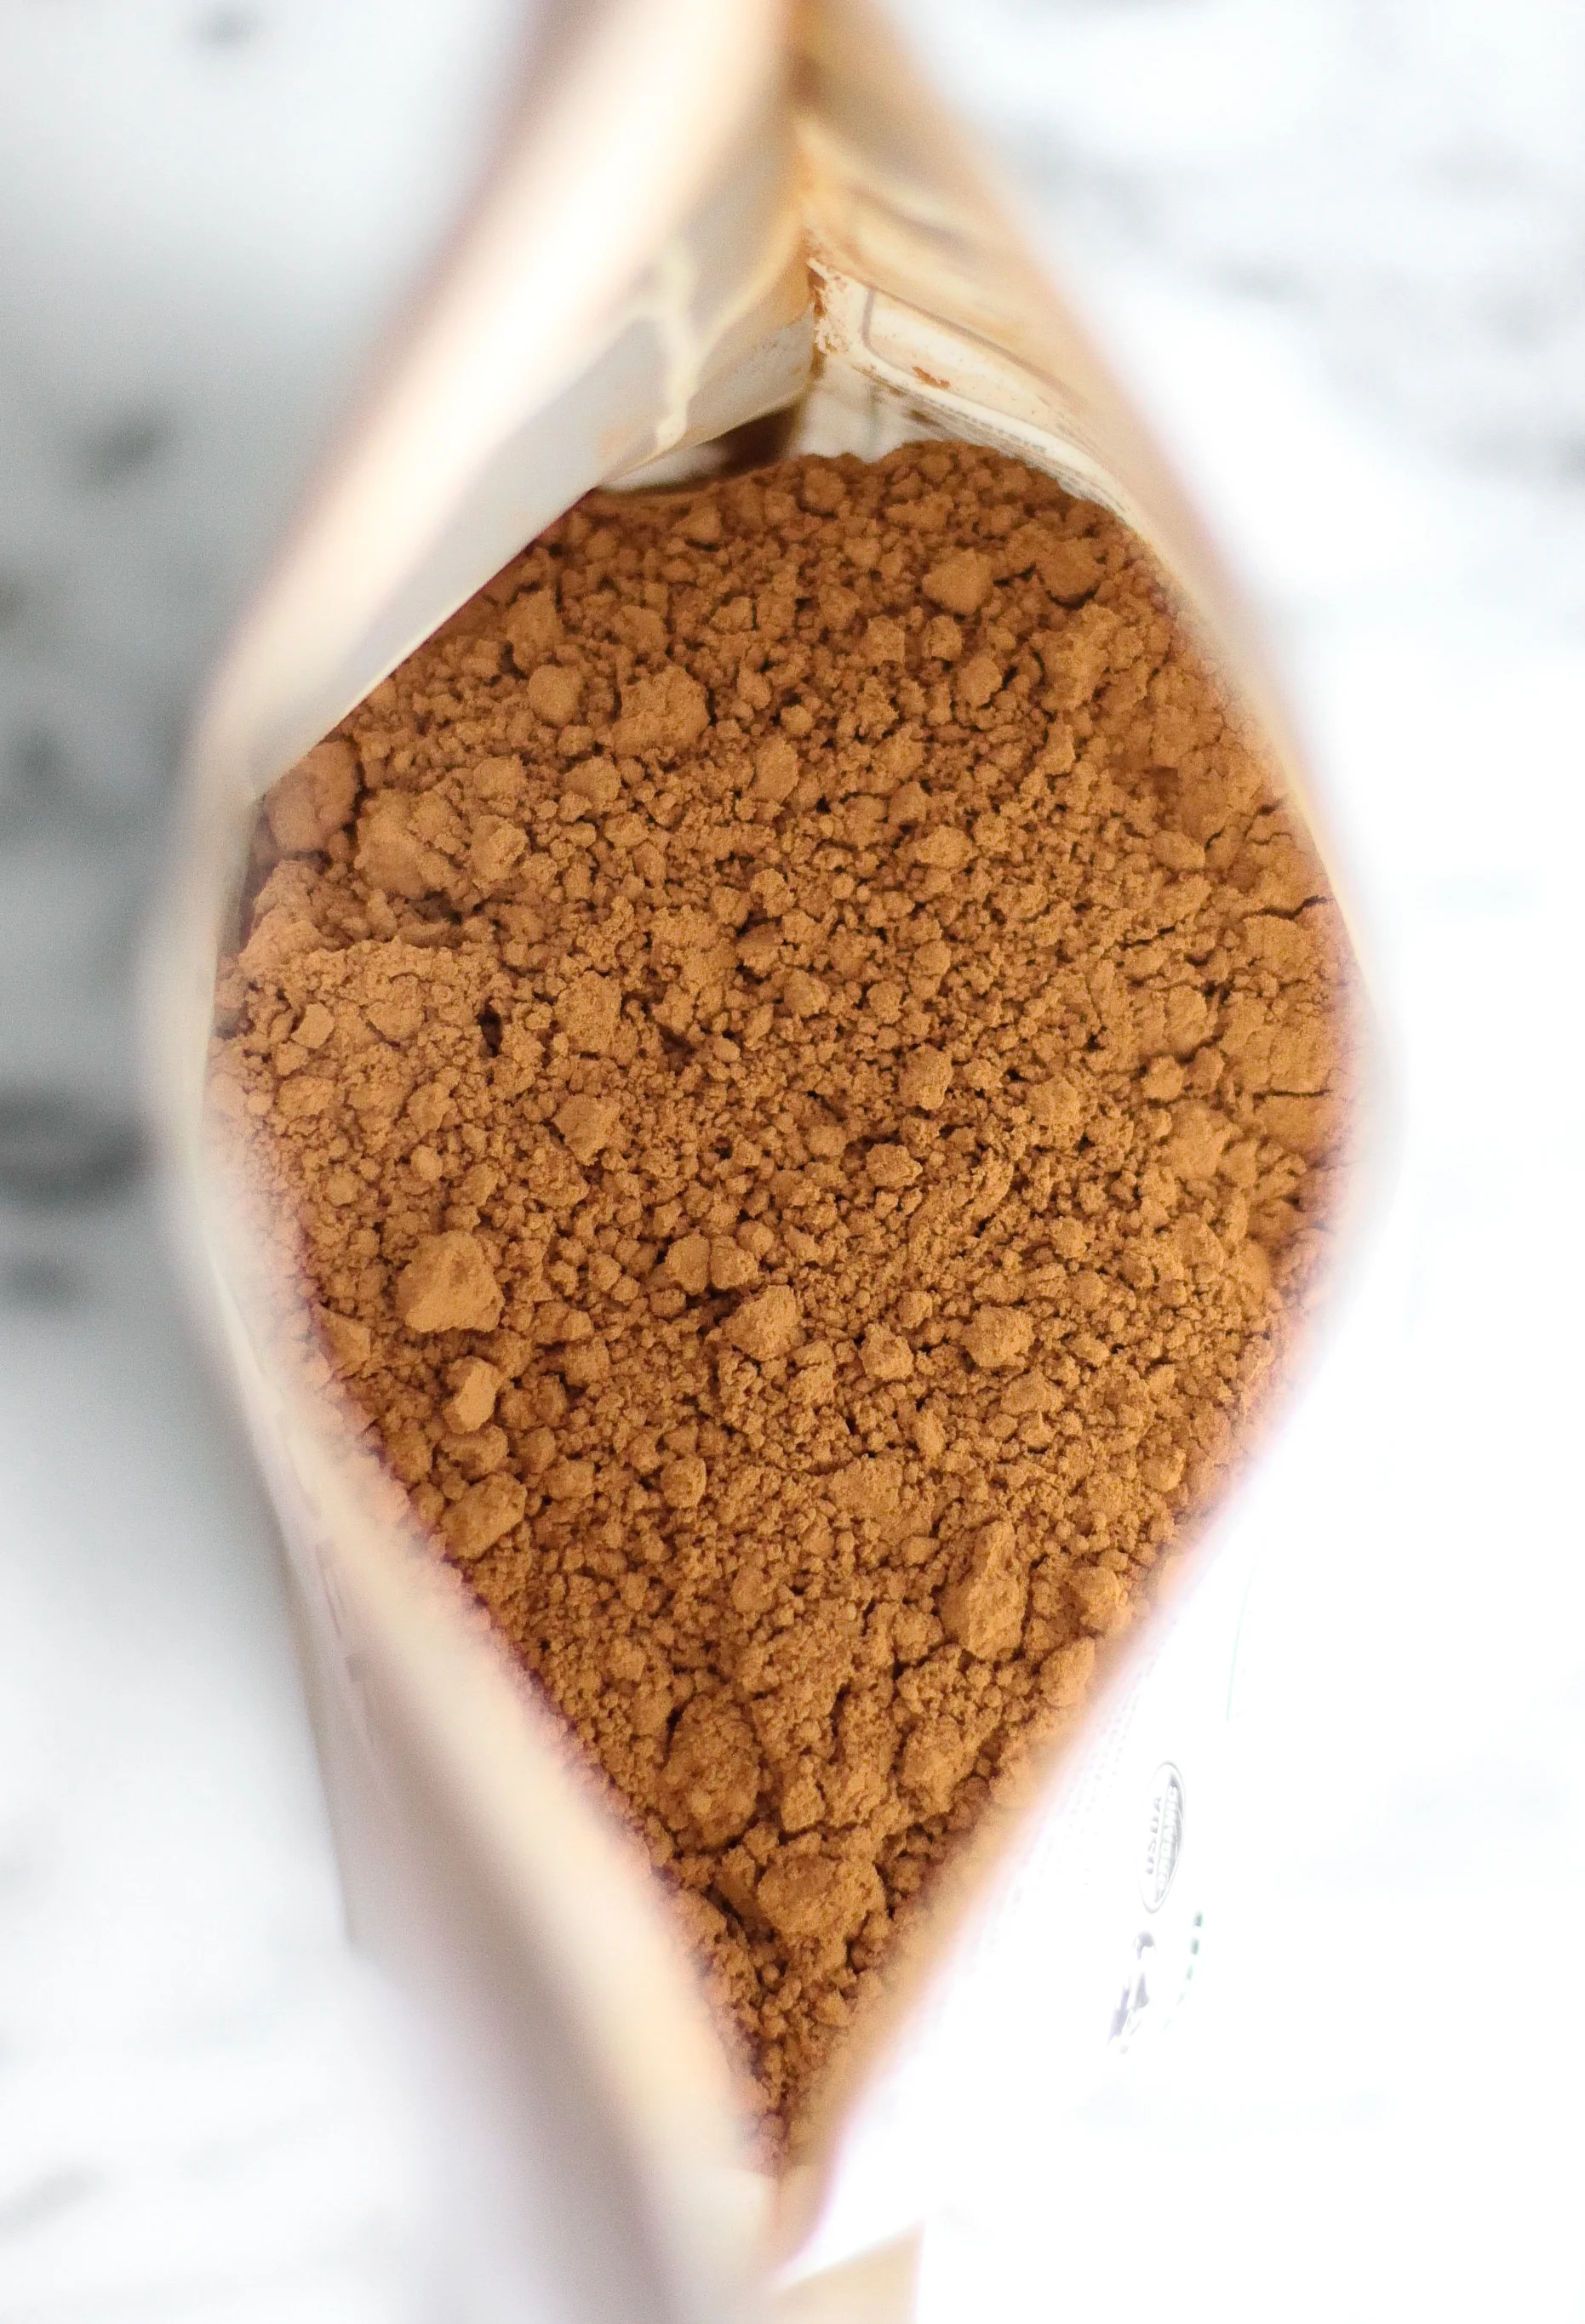
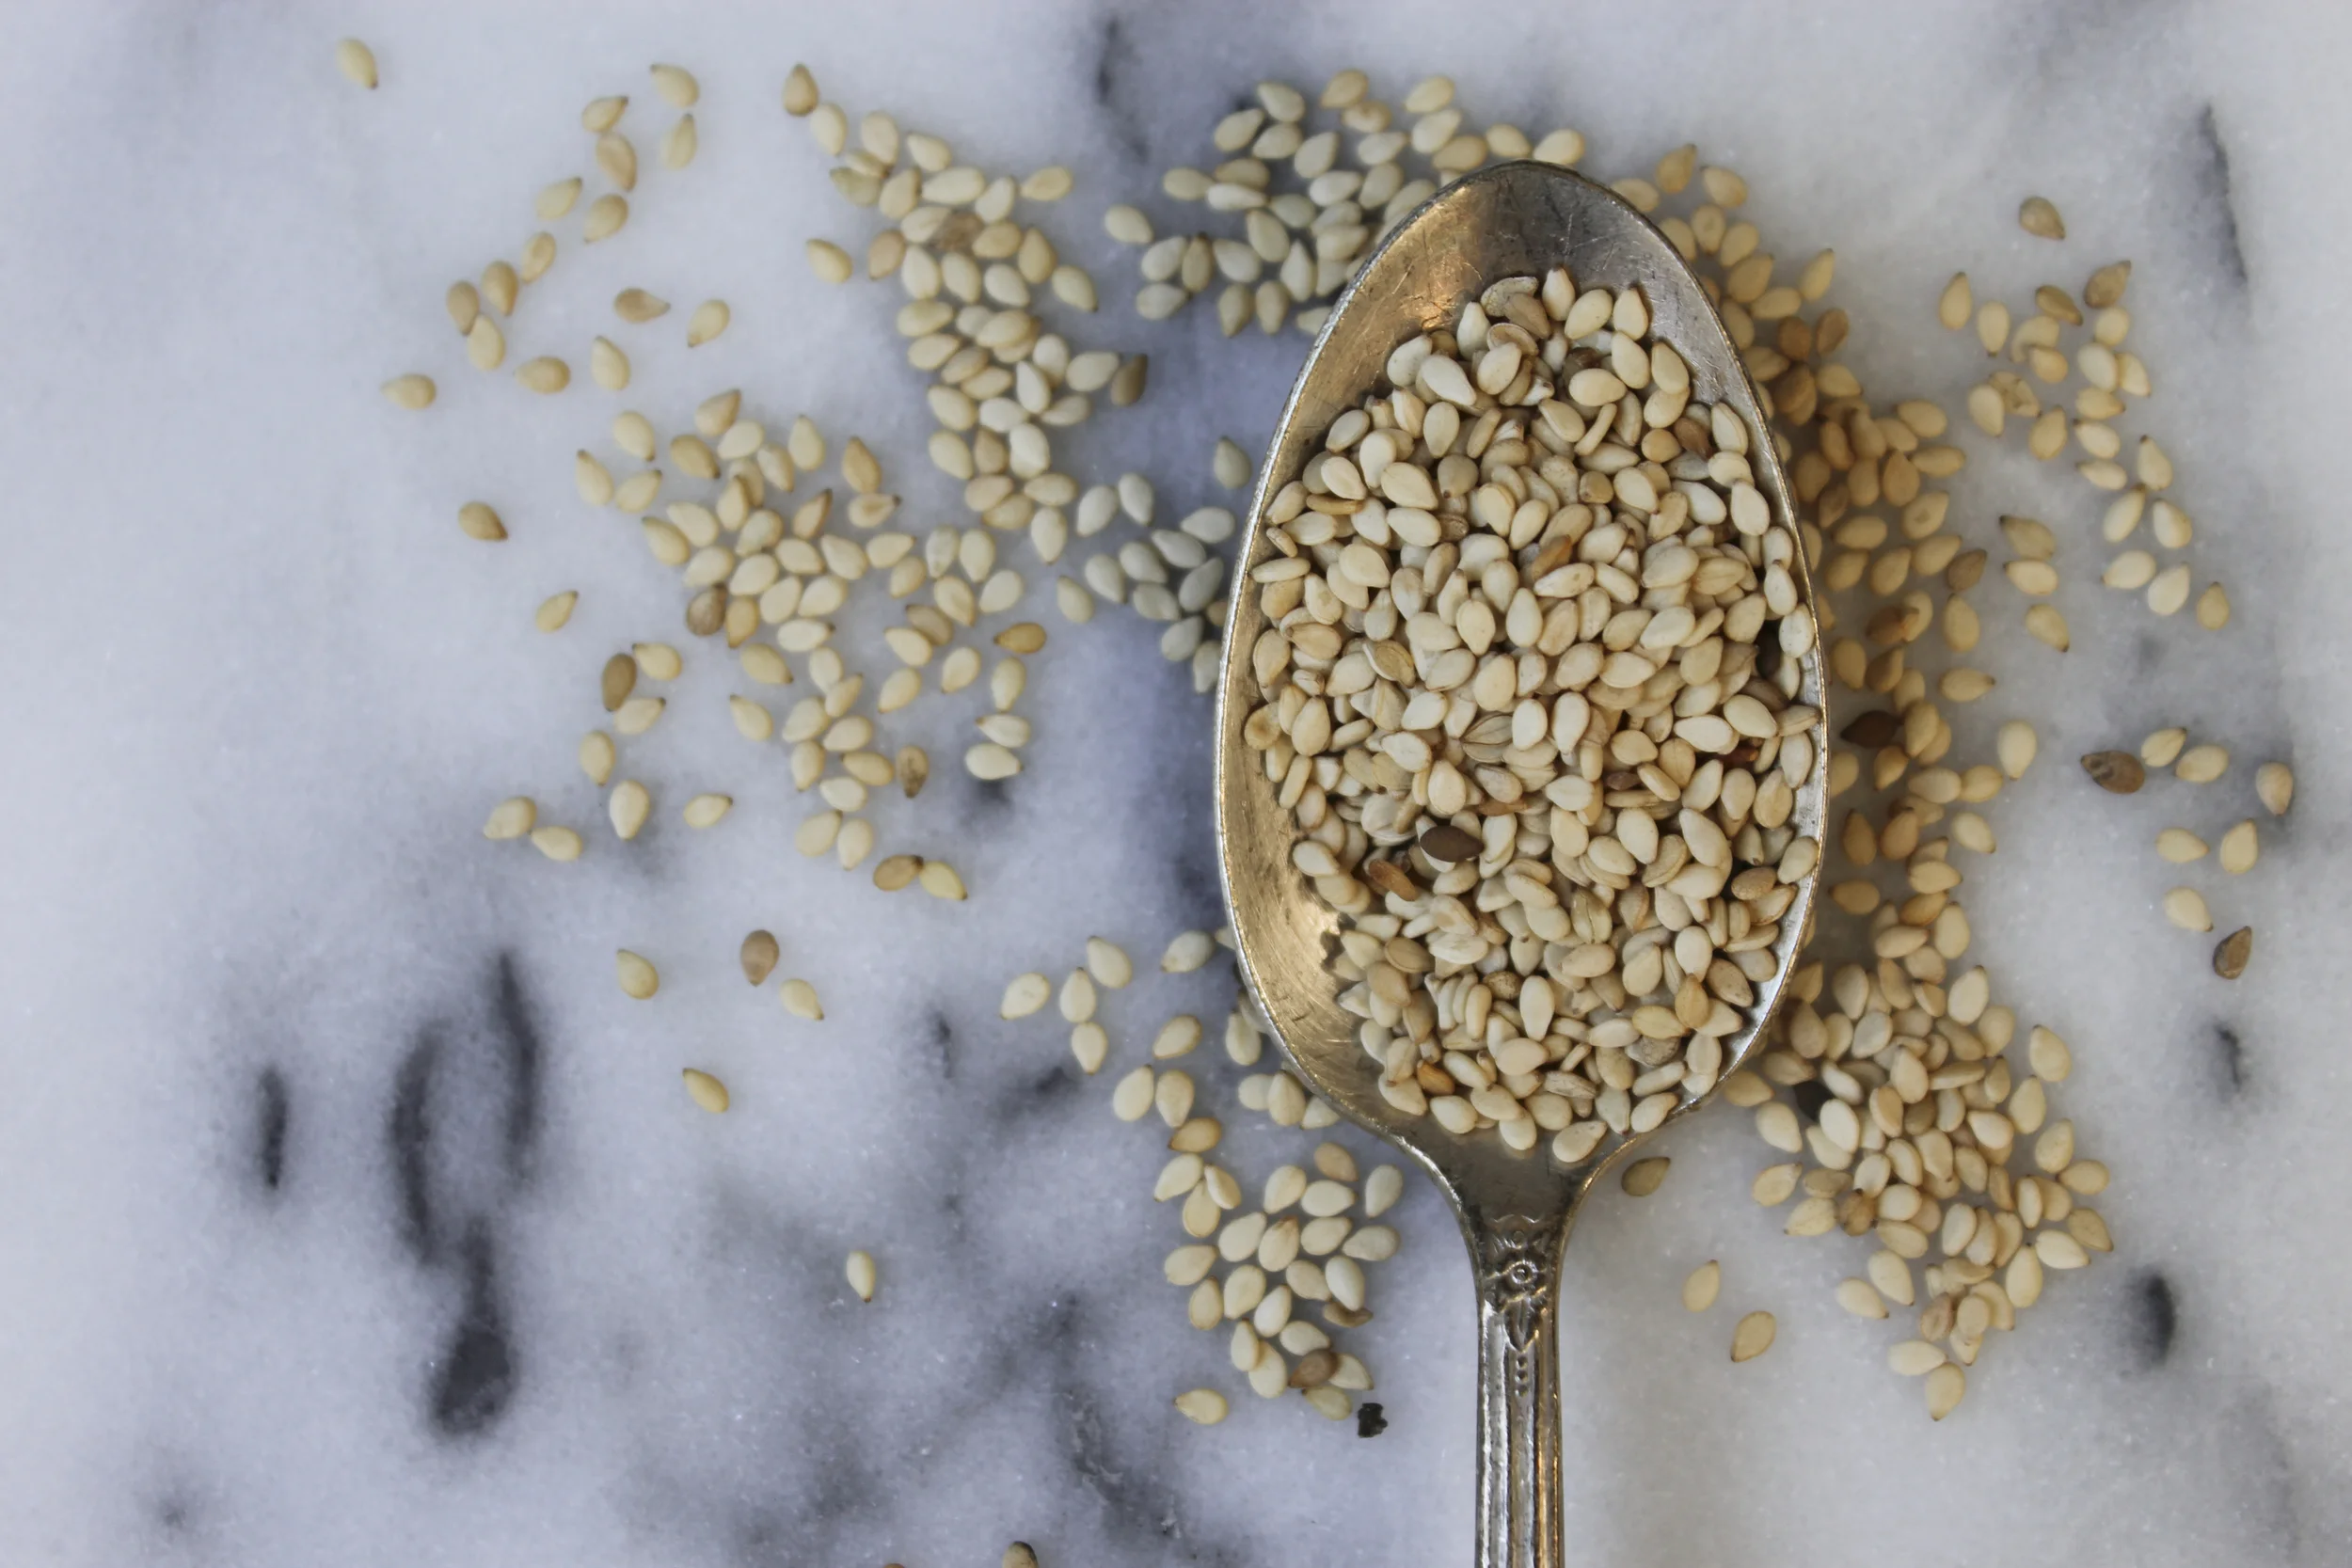
I feel very passionately about tahini. Don’t love it? It’s probably because you’re buying tahini that is mechanically ground, which most tahini is these days. This results in a bitter taste—which is not tahini’s inevitable fate! I encourage you to seek out stone ground tahini, which is the traditional processing method. This results in a suuuuper delicious, not at all bitter, eat it straight from the jar tahini. You’ll also want to make sure to get whole sesame (dark) tahini rather than hulled (light) tahini. This is also harder to find, but well worth the search, as it contains much higher nutrient values than tahini made from sesame seeds that have had the hull—the outer shell—removed. THIS IS MY FAVORITE BRAND. (Sorry, emphatic.) If you’re curious to learn more about tahini processing and nutritional values, check out my post here.

I made and photographed this tahini banana bread over Labor Day and took it to two potlucks that weekend…where multiple people from each gathering asked me for the recipe. Just saying. In case you needed any more convincing. :D

IMG_5829.jpg
IMG_5643.jpg

Black Sesame Tahini Banana Bread
Makes one 9"x5" loaf or two mini loaves
Adapted from A Cozy Kitchen

Ingredients
1 cup white whole wheat flour (or spelt or regular whole wheat if you can't find the white varietal)
1/4 cup almond meal
1/4 cup buckwheat flour
2 Tbsp. black sesame seeds (or brown), plus more for sprinkling
3/4 tsp. sea salt
1 tsp. baking soda
1/3 cup coconut oil, melted
1/4 cup muscovado sugar (unrefined brown sugar)
1/4 cup raw cane sugar
1 egg
1 tsp. vanilla extract
3 Tbsp. tahini
4 ripe bananas, 3 mashed & 1 sliced lengthwise

Directions
1. Preheat oven to 350°F. Grease and line a loaf pan with parchment. Set aside.
2. Mix flours, sesame seeds, salt and baking soda in a bowl. Set aside.
3. In a separate medium bowl, mix coconut oil and sugars together until the sugar begins to dissolve. Whisk in egg and vanilla extract until mixture is smooth and thickened.
4. Add tahini and the mashed bananas to the wet ingredients. Stir until thoroughly incorporated.
5. Pour the dry ingredients into the wet. Gently stir together until just combined (it's okay if the batter is a bit lumpy).
6. Pour batter into prepared loaf pan. Sprinkle additional sesame seeds on top, then place the two long slices of banana on top, cut side face up. Push them down into the batter so they settle a bit.
7. Set pan on baking sheet (it's easier to pull out of the oven this way). Bake until a toothpick inserted in the center comes out clean, about an hour.

Whole Grain Blueberry Apricot Olive Oil Cake

It’s summer cake time! Light, sweet and brimming with fruit, this cake is perfect for all your snacking and/or summer potluck needs.

In addition to being delicious, this cake has relatively few ingredients, is 100% whole grain and is ridiculously easy to make. It is adapted from this Rhubarb Almond Crumb Cake, which I made for a BBQ last weekend and wasn't totally happy with. I loved the consistency (white whole wheat flour is the WAY TO GO with whole grain baking), but it was overly almond-y and the rhubarb was too sour for my taste. Because I am a perfectionist and because I left that entire cake at the BBQ couldn't handle not having any leftovers for myself/my housemates, I remade it the next day with a few adjustments. Olive oil instead of butter because olive oil cakes feel fancy and are delicious. Apricots and blueberries because SUMMER FRUIT!...that isn't rhubarb. Half the amount of almond extract because balance. I wasn't even planning on sharing it on the blog (hence the lack of process photos/still lives of fruit), but it came out so damn well that I knew I had to.

So here we are!

Whole Grain Blueberry Apricot Olive Oil Cake
Makes one 9" cake

Ingredients
2 eggs
1 cup raw cane sugar
1/2 tsp. pink or sea salt
1/4 tsp. almond extract
6 Tbsp. cold-pressed extra virgin olive oil (the flavor will come through in the cake, so quality olive oil is encouraged!)
1 1/4 cup white whole wheat flour (this is a variety of wheat that is lighter than traditional wheat. You can find it at Trader Joe's or in bulk sections of some health food stores)
1 tsp. baking powder
1 cup fresh blueberries
4 apricots, sliced into 1/8" thick wedges
1/4 cup sliced almonds

Directions
1. Preheat the oven to 350°F. Grease a 9" round baking pan and line the bottom with parchment. Set aside.
2. In a stand mixer fitted with a paddle attachment (or with a vigorous arm), whip together the eggs, sugar, salt and almond extract on medium-high speed until light, fluffy and nearly doubled in volume, about 5 minutes.
3. Mix in olive oil.
4. On a low speed, mix in flour and baking powder until just combined.
5. If using a stand mixer, remove the bowl. Gently fold in blueberries by hand. 
6. Pour batter into prepared baking pan. It will be quite thick; use a spatula to even it out on top.
7. Starting in the middle of the cake, create a spiral with the apricot wedges. Sprinkle the sliced almonds around the perimeter of the cake.
8. Bake for 75-80 minutes, until the top is golden brown and a toothpick stuck in the middle comes out clean.

Blood Orange Hot Chocolate + The Amazingness of Cacao!

I accidentally made this blood orange hot chocolate. It was pouring rain here for weeks on end and I found myself making endless variations of cozy chocolate drinks, pairing nut milks and raw cacao with different natural sweeteners and spices. This one was so surprisingly delicious that I knew I couldn't keep it to myself. I want to talk briefly about what raw cacao even is and why it is such a potent, healing food, but first, a brief PSA: 

There is—and there absolutely must be—immense joy in eating healthfully if it is to become a pillar of your life. No one ever achieved joy through depravation, restriction or judgment. For these reasons, we must not only be flexible in our psychology and choices around food, but must also learn to prepare nutrient rich, powerful and health supportive foods in ways that delight us and pleasure our senses. This can seem like a daunting, overwhelming or time-consuming task, I know! It is important to remember that it's a process, not a life overhaul that happens overnight. And, like the process of developing any new skill set, you must be patient with yourself. Start with the basics and expand your knowledge over time. The plus side of this particular skill set is that you get to enjoy delicious food and develop an increased state of physical—and often mental and spiritual—wellbeing as a result.

It also helps to start with chocolate.

Swapping out whatever cocoa powder your have in your pantry for raw cacao is one small action you can take that will have a huge payoff. Raw cacao tastes quite similar to unsweetened cocoa powder, but nutritionally there is a world of difference. The unsweetened cocoa powder we're familiar with is processed using high temperatures, which kills a significant amount of its potent benefits. (Don't even get me started on the sweetened hot chocolate powder...you should most certainly steer clear of that stuff. Read the ingredients next time you encounter some and you'll see why.) Cacao powder, on the other hand, is minimally processed at low temperatures, so its medicinal properties are retained.

It might surprise you to know that cacao is actually one of the most nutritionally complex foods on the planet! It contains over 300 beneficial nutrients and compounds, including vitamins, minerals, proteins, fats, and magical compounds that do things like raise serotonin levels in our brains (elevating our moods) and stimulate libido. Cacao is abundant with antioxidants and contains phytochemicals (naturally occurring plant chemicals that have protective properties) that can help lower cholesterol and support heart health. It has sulfur which contributes to healthy hair and nails; magnesium which helps maximize our use of oxygen to naturally boost energy; and is the highest known plant-based source of iron! Seriously, y'all. All this in the plant from which we make chocolate.

Suffice to say that incorporating raw cacao into your diet is one surefire way you can have your cake and eat it, too. It's great in smoothies and raw desserts (including chocolate bars from scratch!). You can also easily bake with it, although some of the potent nutrients will be compromised when exposed to the heat of the oven. And, my favorite, it's perfect for making healing hot chocolate!

When making hot chocolate with raw cacao, it's important to use a nut milk (homemade is best) or coconut milk rather than cow's milk, because the dairy inhibits our bodies' absorption of many of the antioxidants in cacao. Natural sweeteners, like maple syrup or raw honey, are best to sweeten the hot chocolate because they're whole foods that have trace minerals in them, too. From there, go crazy! This version is vibing with the abundant produce of winter—blood oranges for some tartness and a pinch of ginger for extra spice and warmth. May it help you endure the last stretch of winter before spring begins to bloom.

Healing Blood Orange Hot Chocolate
Serves one

Ingredients
1/2 cup + 1 Tbsp. nut or coconut milk*
2 Tbsp. blood orange juice, fresh squeezed
2 Tbsp. raw cacao powder
2 Tbsp. pure maple syrup
1/4 tsp. ground ginger (or more, to taste)
1/4 tsp. vanilla extract
pinch pink or sea salt

Directions
1. Combine all ingredients In a small saucepan over low heat.
2. Whisk continuously until all ingredients are dissolved into the nut milk and liquid is gently steaming. Serve and enjoy.

*I used homemade cashew milk for this, which is super easy to make! Simply soak 1/2 cup raw cashews for 4-8 hours; rinse; put in a blender with 2 1/2 cups water, a pinch of salt, a dash of cinnamon and some raw honey if desired, and blend on high until smooth. Keeps for 5-7 days.

Browned Butter & Spelt Flour Chocolate Chip Cookies

These are my favorite chocolate chip cookies. Share them with people you love and tell the people you love that you love them. Breathe deeply. Be kind. Create beauty in the world, whatever that looks like to you. It's been a hard year. We all need it.

Full corresponding essay here.

These are, in fact, the best ever chocolate chip cookies...and you should trust me on that, because I've baked a lot of chocolate chip cookies in my life. For many years, I was in search of a recipe that would yield a cookie with as much heft as those you get at fancy bakeries, with crispy edges and thick, gooey middles. After conducting some aggressive research, I found out that melted butter results in crispy cookies, whereas creamed butter results in thicker cookies. SO! The secret trick is to melt half the butter and cream half the butter, which gives you the best of both worlds. And as long as you're melting the butter, you might as well brown it, right? I also threw some spelt flour into the mix because I am physically incapable of baking things without at least 50% whole grains. In addition to a nutritional boost, the spelt lends a nice earthiness to the cookie, which balances out its sweetness. I have tested these babies on at least a dozen people, from California to Indiana, from 12 year-olds to 90 year-olds (and the 30 year-olds in between), and they have all given them a resounding endorsement. Not that I should have to convince you to make cookies, right? 

//

(Best Ever) Browned Butter & Spelt Flour Chocolate Chip Cookies
Adapted from Joy the Baker
Makes 16

Ingredients
1 cup (2 sticks, 16 Tbsp) butter, softened
1 cup muscovado (unrefined brown sugar)
1 tsp. vanilla extract
1/2 cup superfine raw cane sugar
1 large egg
1 egg yolk
1 cup spelt flour
1 + 1/4 cup unbleached All Purpose flour
1 tsp. sea salt
1 tsp. baking soda
1 cup dark chocolate discs, or chopped from a bar
Maldon or other flaked salt, to sprinkle on top

Directions
1. Place 1/2 cup butter (1 stick) in a small pot and set over medium heat, swirling the pot semi-frequently to prevent burning. Continue to heat the butter after it has melted. It will begin to foam, eventually clear and start to turn amber. At this stage, you will see little brown specks form and stick to the bottom of the pot. As soon as there is a collection of these browned specks, remove the butter from the heat and transfer it to a small bowl, browned bits and all. Be attentive with this; it can go from browned to burned very quickly!
2. In a stand mixer with a paddle attachment on medium speed (or with a vigorous arm), whip the remaining 1/2 cup softened butter with the muscovado sugar until fully creamed, about 5 minutes. Beat in the vanilla extract.
3. Once the browned butter has cooled a bit, add that and the cane sugar to the mix and beat until whipped, about 2 minutes.
4. Beat the egg into the mixture until fully incorporated, and then the egg yolk. At this point the batter should be smooth and much lighter in color.
5. In a separate large bowl, mix together the flours, salt and baking soda.
6. Pour the dry ingredients into the wet batter and mix at a low speed until just incorporated. There can still be a few bits of flour peeking through. 
7. Remove the bowl from the stand mixer and gently mix in the chocolate chips with a large spoon.
8. Cover the bowl with plastic wrap, stick it in the fridge and forget about it for 1-2 hours.
9. At this point, the dough should be firm enough to make into balls. Scoop out 2 Tbsp. of dough and smoosh together into one hefty dough ball, then place in a large tupperware. Repeat with remainder of the dough.
10. Refrigerate overnight. 

11. When you're ready to bake the cookies, preheat the oven to 350F. Line a baking sheet with parchment and lay out 6 dough balls, spaced evenly apart. Sprinkle each ball with a pinch of Maldon or other flaky sea salt.
12. Bake until firm and golden around the edges but still a touch undercooked in the middle, about 12 minutes. It is important to take them out of the oven before they are fully baked because the residual heat from the tray will continue cooking them once they're out! No one likes a dry cookie.
13. Cool completely on baking sheet. Then, finally, enjoy!

Blueberry Ginger & Rye Hand Pies

I have been known to describe myself as a health nut with a massive sweet tooth. It can be quite the conflicted state of existence.

When I first began to learn about nutrition and the very real ways particular foods and ingredients wreak havoc on our bodies, I became vigilant about eliminating them from my diet—all in the name of “health”. As extreme approaches to things often do, this wreaked psychological havoc on me (although I of course could not see the forest for the trees at the time). For over a year and a half of my life, I was afraid of butter. And sugar. And white flour. If I ordered a veggie burger at a restaurant and it didn't come with a whole wheat bun, my body would enter a state of physiological panic. I ate heaps of plants and whole grains. Dates after almost every meal to satisfy my sweet tooth. Ate only when I was truly hungry and stopped when I was 80% full. My metabolism completely changed; I eventually lost so much weight that my friends and family started to worry. 

Almost a year into this passionate and incredibly inflexible love affair with healthy food, I began to apprentice in the kitchen of my favorite restaurant. Guess what? They loved butter. And sugar. And loads of vegetables and healthy things too. As a learning chef, I was required to taste everything. Which, of course, reminded me that I loved butter. And sugar. And then I couldn't stop eating it. In the years that followed, which were rife with personal, professional and financial disappointment and struggle, food (read: flour, butter and sugar) became my outlet, my method of comforting myself and showing myself how inept at life I was all at the same time. I gained back all the weight I had lost and more. I felt completely unworthy and completely out of control.

It's scary to write that here. But as both a lover of food and someone who is committed to helping people heal and love themselves (my version of tikkun olam), I feel that it is important to share my story. Because as I have looked within to establish my truths and learn how to embody them (which is an ongoing process), I have seen both my personal world and the world around me change. I eat kale salads and I spend a disproportionate amount of my meager income on baking supplies. I spent an afternoon making these divine hand pies and I allowed myself to savor every bite I ate of them. And that, dear friends, is about self-love and balance and communion with friends and creating beauty and being human. 

Blueberry Ginger & Rye Handpies
makes 14 4" pies
Adapted from recipes by Yossy Arefi,
Apt 2B Baking Co.

Ingredients
Crust
1 1/3 cups unbleached all purpose flour
1 1/3 cups rye flour
1 tsp. salt
1 cup + 2 Tbsp. unsalted butter (preferably organic, pastured/grass fed, European style), chilled
1 Tbsp. apple cider vinegar
8 Tbsp. ice water

Filling + Assembly
2 1/2 cups blueberries
1/2 cup unrefined cane sugar
2 Tbsp. cup unbleached all purpose flour
2 tsp. ginger root, freshly grated
1 vanilla bean, seeds scraped
1/2 lemon (unwaxed), zest only
pinch of salt
extra flour for rolling out dough
1 egg, beaten
2 Tbsp. turbinado sugar

Method
Crust
1. Combine apple cider vinegar and ice water. Set aside.
2. Mix the flours and salt into a bowl. Cut the chilled butter into 1/2" cubes and then add it to the flour. Using your fingers and the palm of your hand, crumble and smash the butter into flat discs, scooping up the flour from the bottom of the bowl and incorporating it as you go. Stop when most of the butter is about pea sized. It's okay if not all of the butter is incorporated. 
3. Sprinkle six tablespoons of the ice water mixture over the dough and work it through gently with your hands. Pick up a bit of dough and see if it sticks together when pressed. If it is still too dry, add more water a little at a time until the dough has reached this state. 
4. Gather all the dough together into a large ball and then gently press it into a rectangle about 1" thick. Wrap tightly in plastic wrap and refrigerate for at least two hours, preferably overnight.

Filling
1. Combine sugar, flour, ginger, vanilla and lemon zest in a large bowl. Using your fingers, incorporate the small and grated bits into the sugar.
2. Add blueberries and gently toss to coat.

Assembly
1. Line two baking sheets with parchment paper.
2. After the dough has set in the fridge for at least two hours, lightly flour a large surface to roll out the dough, keeping the flour nearby. 
3. Roll the dough out into a large rectangle until the dough is about 1/8" thick (aiming for a 12"x16" rectangle), flipping it over as you go and adding more flour if necessary to ensure it doesn't stick to the counter. If it rips, don't fret; just patch it back together. If the dough gets too large and unwieldy, you can cut it in half and place half of it back in the fridge to roll out separately after.
4. Trim the edges of the dough into straight lines so you have a perfect rectangle. Pat the trimmings into a disc, re-wrap and put back in the fridge. Cut the rectangular dough into 4" squares by cutting vertical lines 4" apart from each other starting from one side and then the same horizontally. If you kept the dough in one piece, you should have 12 squares.
5. Brush around the perimeter of each square with your egg wash. Place a small spoonful of the blueberries into the center of each square. 
6. Pick up one corner of each square and fold it to meet its diagonal opposite, creating a triangle. With a fork, press around the folded edges of the triangle. Place on baking sheet.
7. When a baking sheet is full, put it back in the fridge to allow the hand pies to firm up again, at least 15 minutes.
8. Repeat process with the scrap dough that you placed back in the fridge.
9. Preheat oven to 400F.
9. Once the hand pies are all assembled and re-chilled, brush their tops with the egg wash and sprinkle with turbinado sugar. Bake for 30-35 minutes, until golden brown.

***********************************************************************

ONE MORE THING, friends! An ANNOUNCEMENT!

I am super excited to invite you to attend my first ever wellness workshop in Berkeley, CA on Saturday, August 13!

Join me and my dear friend/fellow wellness practitioner Leyna Brabant in exploring your relationship to food and developing tools for balance, attentiveness and vibrancy in your life. We will also be making healthy raw chocolate truffles, so there's that. 

Register here: http://calmmindhappyheart.wix.com/foodasfreedom
Have a friend or loved one who might benefit from diving in with us? You can share it with them on Facebook too.

I look forward to seeing you there!

Tahini Honey (Halva) Macaroons

It's a little crazy, how many years I had been eating hummus before I knew what tahini was. It was never a part of my childhood pantry and, as I only ever encountered it blended into a delectably creamy mess of chickpeas, lemon and garlic, I suppose it makes sense that I hadn't heard of it until I started getting into food in my mid-20's. 

I remember discussing tahini with a friendly employee at my local independent market when I was living in London and how enthusiastically this young, bearded, flannel-wearing Canadian man extolled its virtues. My brain struggled to wrap itself around the fact that A) there was an equivalent of peanut butter made out of sesame seeds and, B) that it was the second main ingredient in a culturally relevant dip that I had been enjoying my entire life. I hastily bought a jar, trotted home, opened it, dunked in a spoon, put the creamy paste to my mouth and—BLEH!!—almost spit it out. It was SO BITTER! I could not comprehend who would voluntarily eat this stuff, let alone recommend it to other people.

Needless to say, I eventually wholeheartedly boarded the tahini train. The turning point came almost a year later when a new friend (incidentally, also Canadian) asked me if I wanted some halva—a Middle Eastern treat which I had also never heard of. Shaped into a bar with the consistency of snappy nougat, this mysterious dessert is traditionally made with two ingredients: tahini and honey. Little did I know it, but this was a watershed moment. Halva changed my life.

Let's just take a moment to appreciate the divine relationship of these two ingredients. Have YOU ever mixed tahini with honey (and a pinch of salt) and spread it on toast…or eaten it with a spoon? Game changer. For real. (On a side note, don't ever buy the commercially packaged halva you typically see in grocery stores or Middle Eastern markets, as it's loaded with corn syrup and other junk. If you're curious to try it—which you totally should—make sure the only ingredients on the package are sesame and honey. Or get it from an outdoor market in Israel, where it is a whooooole other level of cloud-like, melt in your mouth deliciousness.)

A Tale of Two Tahinis

As I began to fully integrate tahini into my life, I quickly learned that there are two different types of tahini: hulled and unhulled. But what does this even mean? What is the difference in flavor, consistency and nutritional value?

The easiest way to understand it is to liken the sesame seed to a grain of wheat, as they both have an outer shell that contains a hefty portion of their nutrients. When this outer bran is removed from a grain of wheat, we get white (or "all purpose") flour; when the outer shell of the sesame seed (called the "hull") is removed (as shown in the middle sesame seed photo above), we get a lighter, more refined version of tahini. This is hulled tahini. Unhulled tahini is like whole wheat bread: thicker, darker, maybe not as sweet and tasty, but packed with way more nutrients.

For such a tiny thing, sesame seeds are actually an incredible source of copper, calcium, magnesium and iron. While the hulled seed still contains some of this nutritional value, it is no longer a whole food and much of it is lost. Take the calcium, for example. According to WHFoods, one tablespoon of unhulled sesame seeds contains about 88 milligrams of calcium (for perspective, one tablespoon of whole milk only contains 17 mg of calcium; maybe we should start feeding our youths sesame milk instead?). Once the hull of the sesame seed has been removed, the calcium content plummets to about 37 milligrams, which is 60% less! 

Unfortunately for us, most commercial brands of tahini are made out of hulled sesame seeds because they blend more smoothly and are less bitter in taste. Unless your jar of tahini says "unhulled" or "whole" in front of the word "sesame" on the front or in the ingredients list, it's safe to assume that you've got the refined version. I picked up a jar of Al-Arz Whole Sesame Tahini in Israel which was the sweetest tahini I've ever tasted. When I returned home, I was able to track it down at a Jewish market in LA (yes, okay, I emailed the manufacturer to find out if they had US distribution, shhhh). Sadly, I haven't found a single brand of unhulled tahini in the Bay. But the good news is that if you can't find it in your area and don't want to buy it online, you can always make your own. Just make sure you buy raw, unhulled (brown) sesame seeds when you do!

Halva is the New Healthy [Macaroon]

I knew I wanted to create something to share with you all in time for Passover (in case that's your jam) that would also be non-denominationally delicious. Running through the list of traditional dishes in my head, it wasn't too long before lightning struck: halva macaroons! Most of the macaroon recipes I've seen and tested use condensed milk as the primary sweetener and binder, which yes, is delicious, and is also pretty terrible for you. Halva spread (tahini + raw honey, not turned into candy-nougat-treat) is delicious, super nutritious, AND basically the consistency of condensed milk! I felt like I was onto something big, and guess what? It totally worked! 

I made these macaroons on the larger side because I was feeling excited about them and was feeding them to grown adults, not small children (mostly; hi Sadie and Theo!). I invite you to make them whatever size feels right for your crowd, just be mindful to adjust the baking time accordingly. I also drizzled the chocolate because I thought it would look pretty, but I encourage you to dip the tops of the macaroons in it if you want a richer party in your mouth. 

Tahini Honey (Halva) Macaroons
Adapted from Danny Cohen's 'Danny Macaroons' recipe
makes 26 1" cookies

Ingredients
2/3 cup tahini (preferably unhulled) 
1/3 cup raw honey
1 tsp. vanilla extract
14 oz. (4 1/4 cups) unsweetened, shredded coconut
2 large eggs, whites only
1/4 tsp. sea salt
1/4 cup dark chocolate chips
1 tsp. coconut oil
Flaky sea salt (like Maldon), to finish

Method
1. Preheat oven to 350°F. Line a baking sheet with parchment and set aside.
2. In a small saucepan, melt honey over low heat until entirely liqueified.
3. Add tahini and whisk together until the mixture becomes like the consistency of condensed milk, thick but still runny.
4. Whisk in vanilla.
5. In a large bowl, mix together the shredded coconut and salt.
6. Pour the tahini honey mix into the coconut and, using your hands, blend together until the coconut is entirely covered. The consistency will be sticky and crumbly, almost like a crumb cake topping.
6. In a stand mixer with a whisk attachment or with an electric beater/whisk, beat the egg whites until stiff peaks form.
7. Gently fold egg whites into the coconut mixture.
8. Using your hands, form 1"-2" balls with flat bottoms out of the coconut mixture and set on parchment. They can be set close together, as they will not expand when baked.
9. Bake macaroons for 13-18 minutes, depending on size, until the tops and bottoms are golden.
10. Once the macaroons are done baking, remove from oven and set aside. Cool completely on tray.
11. Melt chocolate chips and coconut oil in a double boiler. Drizzle chocolate over macaroons with a fork or, once the macaroons have cooled, dip the tops or bottoms of them into the chocolate. Finish with a pinch of flaky sea salt.
12. Refrigerate for 10 minutes to allow the chocolate to set. 

Macaroons will keep refrigerated for up to a week.

Roasted Pear & Ginger Skillet Crumble

I have a confession to make: I have a massive sweet tooth. I stare, aghast and confused, at people who say they don't like chocolate; will happily drive from the East Bay to SF just to get a Tartine morning bun; and eat potentially dangerous amounts of cookie dough straight from the bowl. Ironically, I am also a mild health nut. I vigilantly read the ingredients on every packaged item I buy; love seeing a spectrum of radiant hues on my plate; and am well educated on the horrors that refined sugar inflicts on our bodies. As you may imagine, it is oftentimes difficult to reconcile these two things. 

I began slowly. When baking, I swapped out portions white flour for whole wheat or spelt in recipes. Used molasses-rich, unrefined muscovado instead of brown sugar; a bit of apple sauce instead of oil. And then I discovered dates: nature's carmel. The one incredible whole food, chock full of fiber and nutrients, that could conceivably pass as candy, could serve as the binder in raw truffles and sweeten oatmeal so well that sugar or maple syrup became superfluous. My palate and cravings shifted and I began to savor the creativity in experimenting with making decadent treats that would also make my body feel good. Full disclosure: this crumble is one of those treats.

Arguably the best thing about this dessert is that it is free of refined sugar, gluten and dairy, yet no one who eats it would ever know. It is a wonderful dessert for these chilly winter months when you're still craving something sweet, warm and comforting while trying to take a break from the indulgence that the holidays inevitably bring. Plus it's perfect for your vegan and gluten-free friends! Everybody wins.

While traditional crumbles build their topping from butter, white flour and refined sugar, this version uses a variety of nuts, spices, and muscovado sugar to create its crunchy, crumbly crust. The nuts provide our bodies with protein, vitamins, minerals and heart-healthy mono-unsaturated fats, which help lower LDL (the "bad") cholesterol levels and increase HDL (the "good") cholesterol in our blood. Muscovado, while certainly still sugar, is an unrefined variety that retains much of the nutritional value of the molasses (which is super high in iron!) that gives it its distinct, rich flavor. I was surprised when I first learned that brown sugar is subjected to the same refinement process and chemical treatment as conventional white sugar—it just has the molasses is added back in after—but c'est vrai

Truth be told, pears were never a fruit that particularly wowed me until I was subjected to the bleak yield of winter produce while living in the UK. In those dark months, they were a most welcome respite from the unending root vegetables and hardy winter greens that filled my local farmers' market stalls. Maybe it was the desperation, but I swear those pears were more succulent than any I had ever tasted. They completely won me over and created the spark for this roasted winter crumble. It's adapted from a recipe by the ever-inspiring Sarah B. of My New Roots, who created hers in the summertime using raw peaches. That's part of what I love about it though: the formula. Swap the peaches for pears in the winter, or figs in the summertime, apples in the fall, apricots in the spring. You really can't go wrong.

Roasted Pear & Ginger Skillet Crumble
Adapted from My New Roots' Peachy Keen Raw Cobbler

Ingredients
Filling
10 pears (I used D'Anjou, but Bartlett, Bosc and Comice would work well too)
1 Tbsp. coconut oil, melted
1 tsp. cinnamon
1/2 lemon, juice & zest
2" piece ginger root, grated
5 Medjool dates, pitted
1 tsp. vanilla extract

Topping
1/2 cup raw brazil nuts
1/2 cup raw walnuts
1 cup raw pecans
1/4 cup muscovado sugar
1 tsp. cinnamon
1/2 tsp. ground ginger
1/4 tsp. sea salt

Method
1. Preheat oven to 350°F/177°C. Cut pears into 1/2" cubes.
2. In a roasting pan, toss pears with coconut oil and cinnamon. Roast until soft, about 30 minutes, mixing halfway though.
3. Meanwhile, pulse all topping ingredients in a food processor until roughly crumbly (not nearly as fine as sand). Pour out and set aside.
4. Once pears have roasted, put 1 cup of of the pears in the food processor along with the lemon juice and zest, grated ginger root, dates and vanilla extract. Blend until it is completely puréed. 
5. Place the remaining roasted pears In a well oiled cast iron skillet (or a pie or cake pan if you don't have one). Pour the filling purée over the pears and gently mix them together. Smooth the filling flat and sprinkle the nut crumble evenly on top.
6. Return to oven and cook until nuts are toasty, 10-12 minutes.
7. Enjoy warm. Top off with ice cream if desired!